How to Build a Fireplace Insert Surround System for Your Home

Looking to upgrade your outdated fireplace into a stunning focal point? Building a fireplace insert surround is a rewarding DIY project that can dramatically improve your living space without breaking the bank.
This guide will walk you through the process of creating a custom fireplace surround that perfectly fits your insert and complements your home’s style.
If you’re aiming for rustic charm, modern simplicity, or traditional style, you’ll find all the crucial steps and tips you need.
With basic carpentry skills and the right tools, you can complete this project in a weekend.
Build a Fireplace Insert Surround: Step-by-Step Guide
Here are the materials and tools required for building a fireplace unit in your home:
| Materials Needed | Tools Required |
|---|---|
| 2×4 lumber | Miter saw |
| 2×2 lumber | Circular saw |
| 1×2 lumber | Drill |
| 3/4-inch plywood | Kreg jig (pocket hole system) |
| Cove molding | Brad nailer |
| Electric fireplace insert (23-inch recommended) | Hammer |
| Wood screws (2.5-inch and 3-inch) | Pry bar |
| Brad nails (1-inch, 1.25-inch, 2-inch) | Utility knife |
| Wood glue | Sanding tools |
| Spackle | Measuring tape |
| Wood filler | Level |
| Caulk | Clamps |
| Primer | |
| Paint (white or color of choice) |
Now that you have an understanding of the tools and materials required for this project, let’s break down the steps for building a fireplace insert surround:
Step 1: Remove Existing Baseboard

Mark the wall area for your fireplace surround installation. Cut the baseboard at these marks using a utility knife or Dremel tool to create clear borders.
Score the top caulk line with your knife to break the wall-baseboard seal. Gently insert a pry bar between wall and baseboard, then use a hammer to slowly pull the baseboard away from the wall, working with care to protect the wall surface as you remove the section.
Step 2: Cut the Framing Lumber
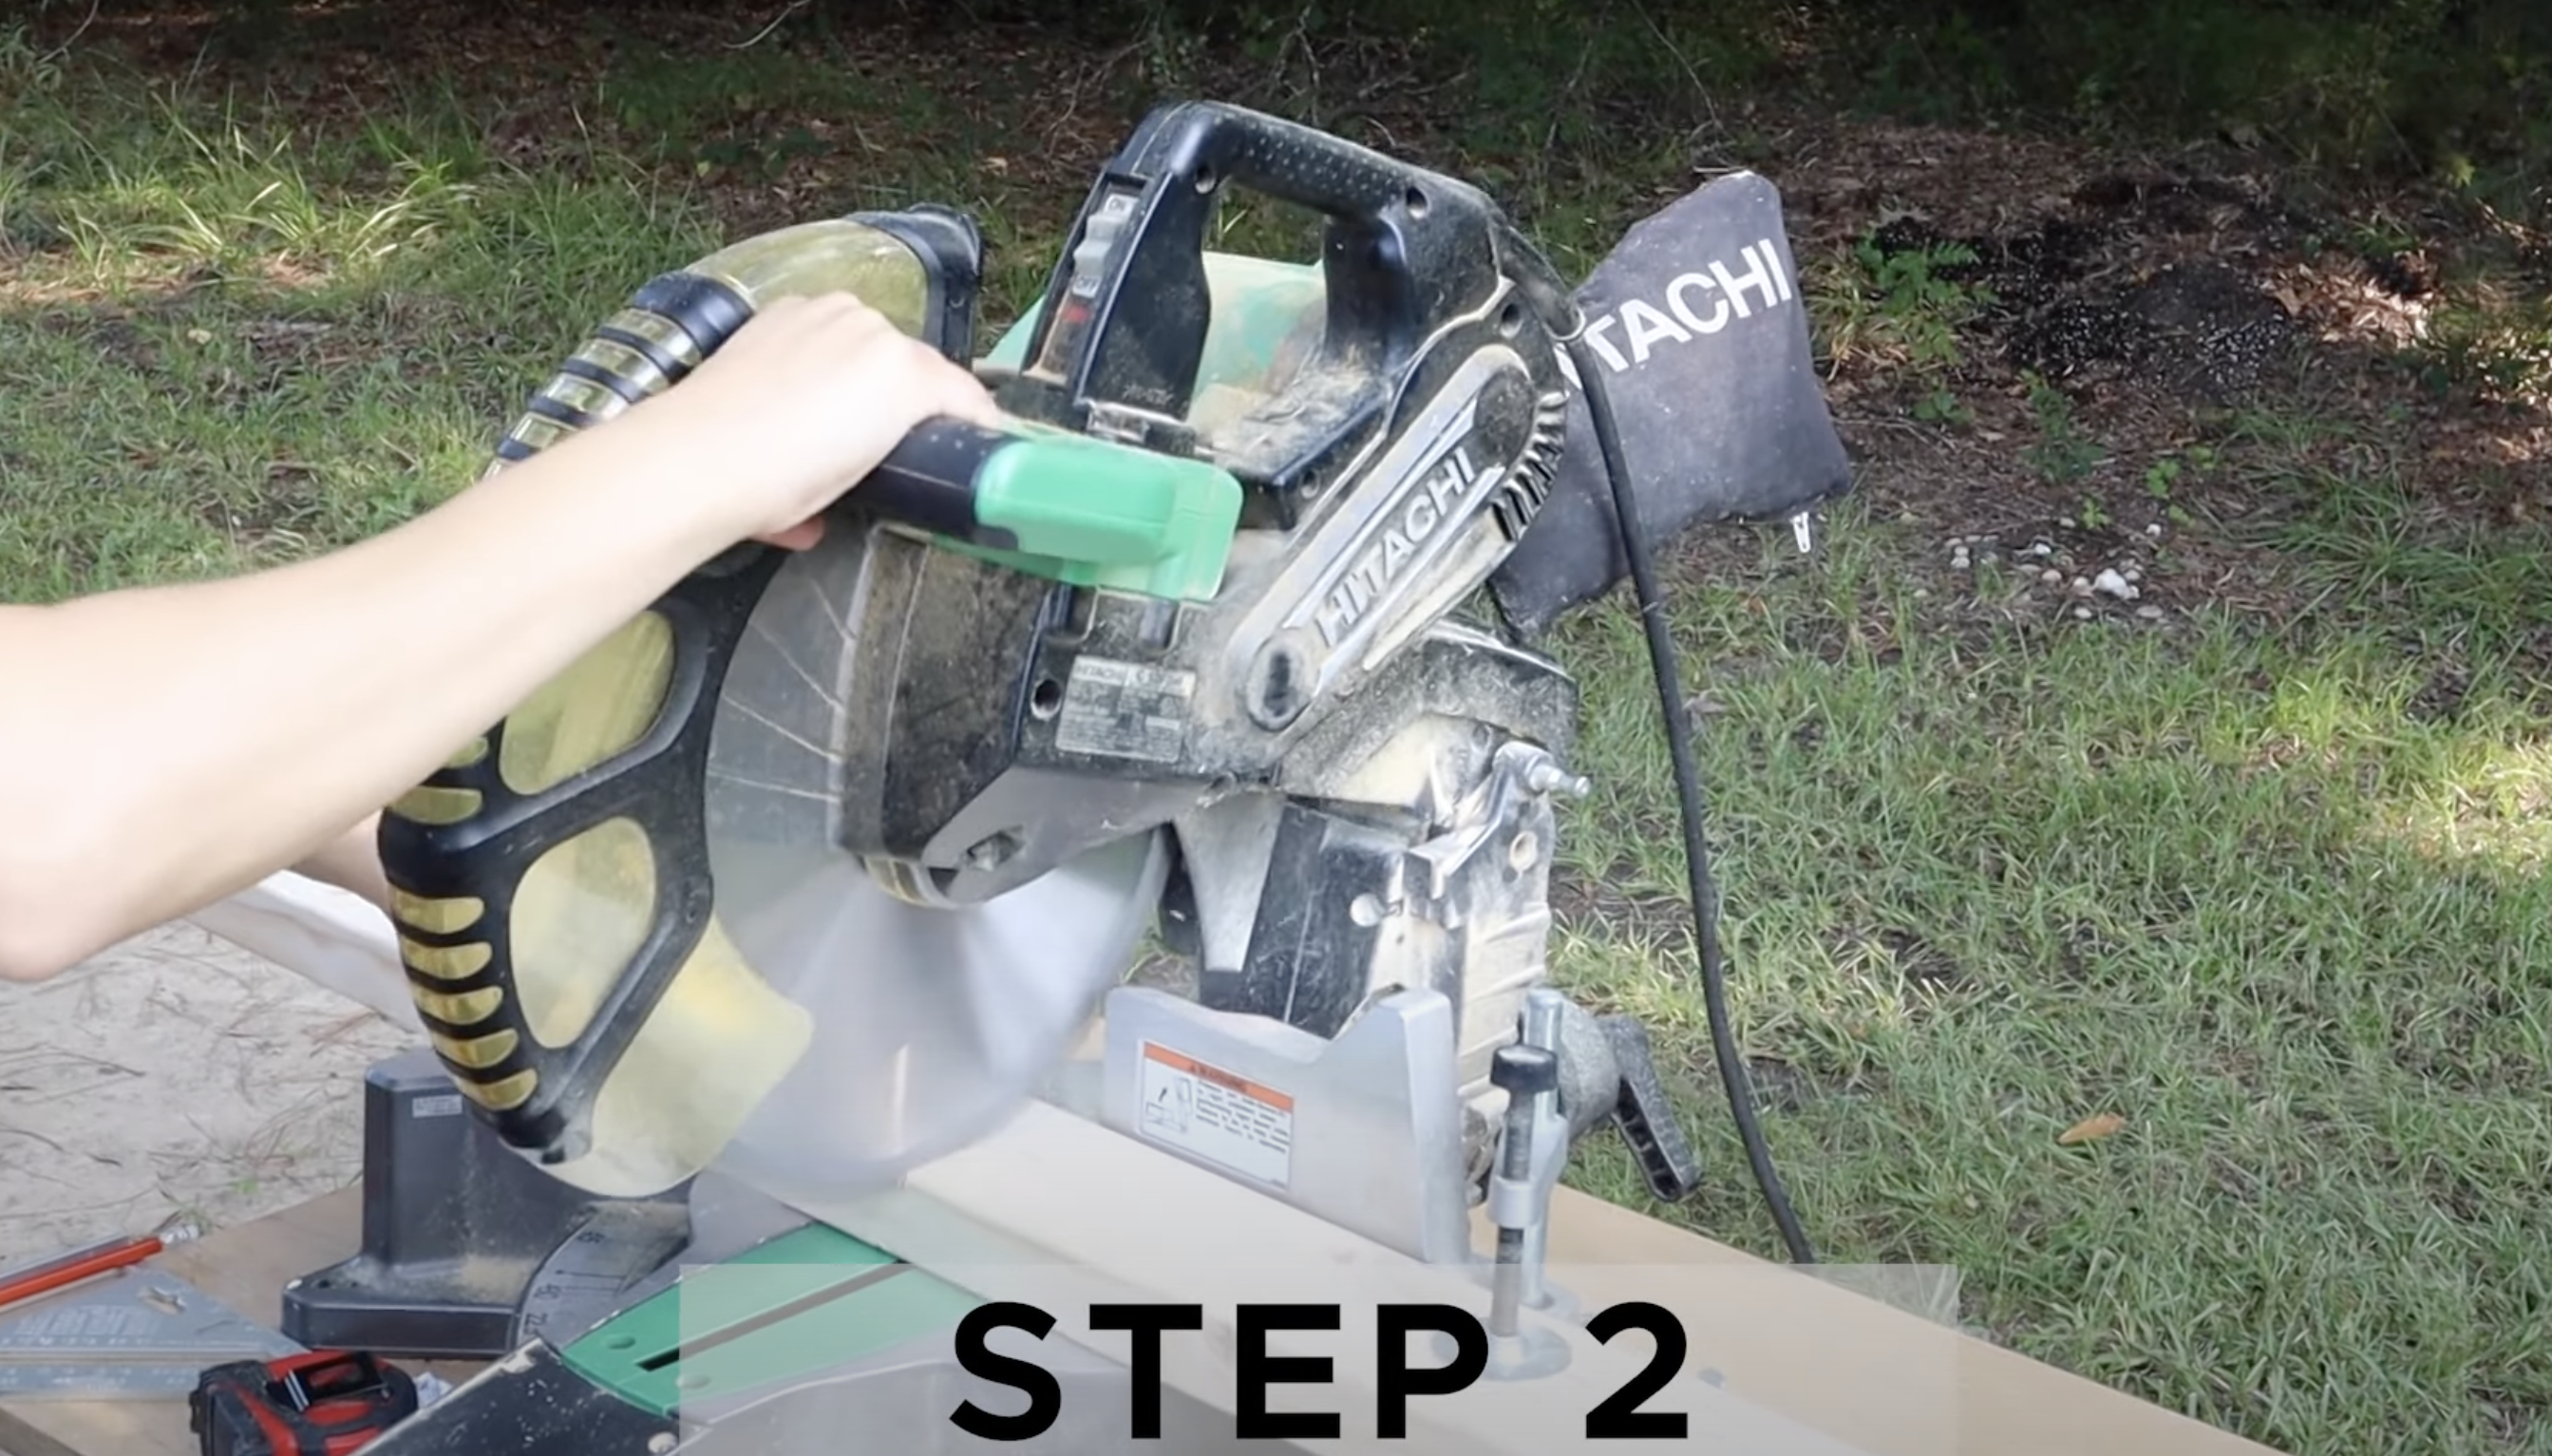
Measure and cut all lumber pieces based on your fireplace dimensions. Cut the 2×4 boards for the main frame, making sure measurements are exact for a square, level finished structure.
Next, cut the 2×2 boards that will work as internal supports. Sort all cut pieces by size and purpose, placing them in order of use to make assembly easier and to check that you have all needed parts ready.
Step 3: Create Pocket Holes

Set your Kreg jig for 1.5-inch-thick lumber, adjusting the drill bit depth collar to match. Make pocket holes on both sides of the middle 2×4 boards that will form front and back frames, placing holes at joining points.
For shorter 2×4 boards, add pocket holes to just one side since these connect at one end only. These holes create strong, hidden connections that give structural strength without showing screws on the finished surface.
Step 4: Build the Front Frame

Arrange front frame pieces on a flat work surface based on your plan. Connect 2×4 boards with pocket hole screws to form the outer rectangle. Position and attach the three 3.25-inch short boards to one end board:
- Top position
- Middle position
- Bottom position
Clamp the 2×2 board along the short boards’ edge to keep alignment during installation. Secure the 2×2 to all three boards with self-tapping 2.5-inch screws, using scrap wood underneath for: Support and Proper alignment.
Repeat this process on the opposite side to finish the front frame structure.
Step 5: Construct the Back Frame

Create the back frame by joining 2×4 boards with pocket hole screws to form a rectangle like the front frame. Position one horizontal board 8.5 inches from the bottom edge and secure it. Add another horizontal board at the top edge.
Attach four sideboard frames to the middle section of the back frame, placing them exactly 8.25 inches inward from each side edge. Finish the back frame by adding three support boards along each end at the top, middle, and bottom positions for structural strength.
Step 6: Attach the Back Frame to the Wall

Before permanent installation, locate and mark the position of wall studs using a stud finder to ensure secure attachment.
Position the completed back frame against the wall in your desired location, checking that it sits flush against the wall surface. Use a level tool to ensure the frame is perfectly straight both horizontally and vertically, making adjustments as needed.
Once properly positioned, secure the back frame to the wall studs using 3-inch screws, driving them through the frame and into the studs for maximum stability and support.
Step 7: Connect Front Frame to Back Frame

Position the finished front frame by lining it up with the mounted back frame to ensure they’re parallel with proper spacing. Use clamps to hold the front frame in the right position relative to the back frame, checking measurements for even spacing.
With everything firmly clamped, connect the front frame to the side frame boards using 2.5-inch screws, driving them through the front frame into the side support edges. Check that the whole structure stays square and level after making this connection.
Step 8: Install Middle Support

Measure and cut three 8-inch 2×4 boards to create the central support system for your electric fireplace insert. Install these boards in the frame’s center section, placing them to form a stable base that will hold the insert’s weight properly.
After installation, place your electric fireplace insert into the opening temporarily to check the fit, making any needed adjustments to the supports. Make sure the electrical plug can reach an outlet easily and that the insert has enough space around it for proper function and air flow.
Step 9: Cut and Install Plywood Panels

Measure the frame for exact plywood dimensions. Cut plywood using a circular saw. Create beveled edges on top corner pieces with a straight edge guide.
Install side boards with 1.25-inch nails, keeping them flush. Add the top board with beveled ends, then the bottom board. Attach a second plywood layer to finish the surface.
Step 10: Add Trim and Molding

Cut trim at 45-degree angles for clean corners. Install 1×2 outer trim with glue and 1.25-inch nails. Attach 2×2 pieces with 2-inch nails.
Test-fit cove molding and sand uneven areas. Secure molding with 1.25-inch nails into plywood and 1-inch nails into trim.
Step 11: Prepare the Surface for Finishing

Fill all nail holes with spackle, pressing it firmly and removing the excess. Apply wood filler to trim seams and joints, smoothing with a putty knife to hide transitions.
Wait for spackle and wood filler to dry completely. Sand filled areas with increasingly finer sandpaper until the surface feels smooth.
Finish by applying caulk in the gaps between the plywood, trim, and the wall. Smooth the bead with a damp finger for a clean look.
Step 12: Prime and Paint
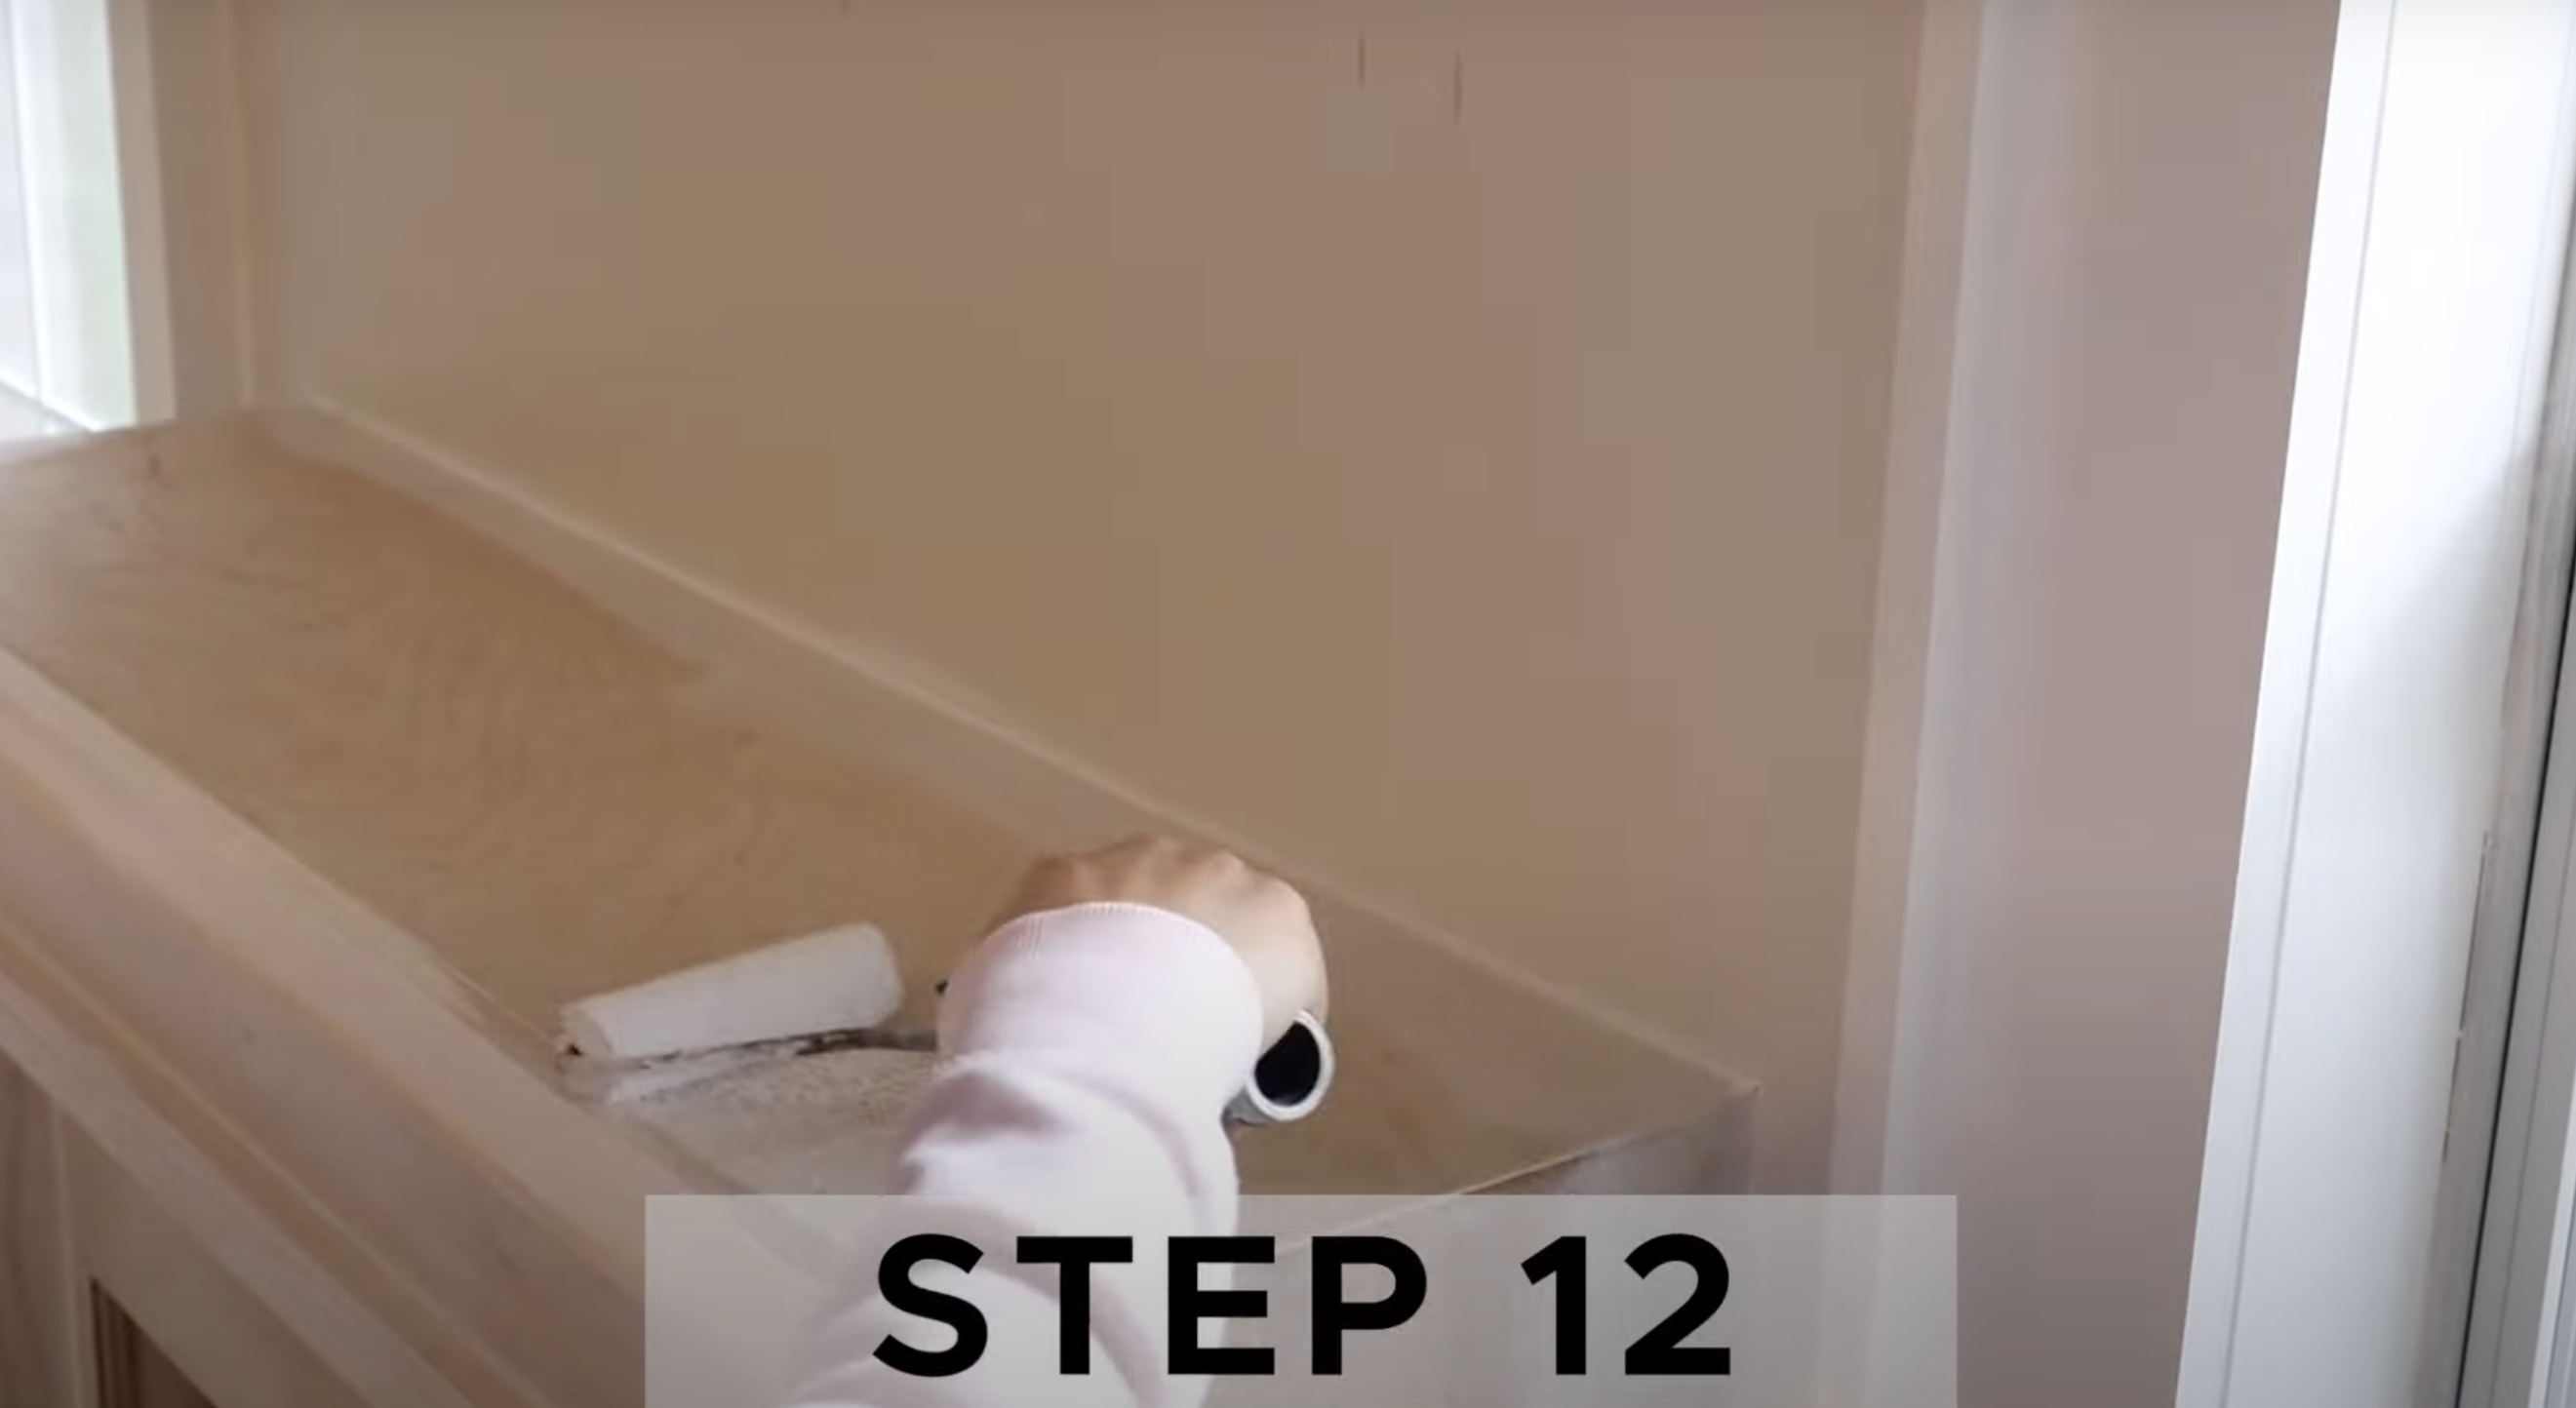
Apply high-quality primer to all surfaces with a brush for details and a roller for larger areas. Let it dry completely per the manufacturer’s timing – typically overnight.
Once dry, add your first paint coat in even strokes while keeping a wet edge to avoid lines. Let this coat dry fully before adding a second coat for complete coverage. Give the paint plenty of time to cure before moving to the next step.
Step 13: Install the Fireplace Insert

Make sure the power connection is easy to reach through your surround’s opening. Slide the insert into the cavity.
Check that: it sits level, fits snugly, and has proper clearances according to safety guidelines.
Secure the unit:
- Use the mounting holes if available
- Follow manufacturer’s instructions for screws
- Test all features after installation to confirm everything works properly.
For anextensive tutorial, you can check out this guide on YouTube:
Popular Types of Fireplace Surrounds for Every Style
Here are some popular designs of fireplace surrounds that you can take inspiration from:
- Traditional Wood Mantel Surround: This classic design features wooden elements with decorative moldings, columns, and a substantial mantel shelf. Often painted white or stained in rich wood tones, traditional surrounds work beautifully in colonial, Victorian, or traditional-style homes, providing ample display space on the mantel.
- Stone or Brick Veneer Surround: Natural stone or brick veneer creates a rustic, organic look that brings texture and warmth to a space. Options range from stacked stone, river rock, limestone, or classic brick patterns. This style works particularly well in craftsman, farmhouse, or mountain-inspired interiors.
- Marble or Granite Surround: Marble or granite surrounds feature polished stone slabs for a luxurious appearance. Available in countless colors and patterns, these natural stone options create a high-end look perfect for formal living rooms or master bedrooms.
- Modern Minimalist Surround: Clean lines and simple geometry define minimalist surrounds, often featuring smooth concrete, metal, or monochromatic tile. These understated designs typically lack ornate details or large mantels, focusing instead on proportion and material quality for a contemporary style.
- Tile Surround: Ceramic, porcelain, or glass tile surrounds offer endless customization possibilities through pattern, color, and texture. From subway tiles to intricate mosaics, these surrounds can complement any style from Mediterranean to mid-century modern, providing both heat resistance and decorative appeal.
Conclusion
With your fireplace insert surround now complete, you’ve successfully created a stunning focal point that transforms your living space.
Remember to take your time with the finishing touches, such as sanding, caulking, and painting. This can make all the difference between an amateur project and a professional-looking result.
Now sit back, turn on your new fireplace, and enjoy the cozy atmosphere you’ve created. Your custom fireplace surround will be a source of pride and comfort for years to come.


