Complete Guide to Drywall Ceiling Layout and Installation
A drywall ceiling layout is the foundation for a smooth, attractive ceiling that enhances any room’s appearance.
Planning this layout thoughtfully ensures proper alignment of drywall sheets, efficient use of materials, and minimal waste.
If you’re installing a new ceiling or repairing an existing one, understanding drywall ceiling layout basics helps achieve a professional finish.
It involves measuring, marking, and positioning drywall panels accurately to create a seamless surface.
This guide will walk you through the essential steps and tips for a successful drywall ceiling layout, making your project easier and delivering great results.
Tools Required for Drywall Ceiling
Before you begin installing drywall on your ceiling, it’s essential to have the right tools on hand. Here’s a list of the key tools you’ll need for the job
| TOOL | AVERAGE PRICE (PER UNIT) |
|---|---|
| Measuring Tape | $5 – $15 |
| Utility Knife | $8 – $12 |
| Drywall Lifts or Scaffolding | $25 – $50 per day (Rental) |
| Drill and Screws | $25 – $50 (drill); $6 – $10 (box of 1,000 screws) |
| Drywall Saw | $15 – $30 |
| Taping Knives (Set) | $10 – $20 per set |
| Sanding Sponge or Pole Sander | $3 – $6 each |
| Level | $10 – $25 |
| Stud Finder | $15 – $30 |
*Prices may vary according to the regions
Materials Required for Drywall Ceiling
Below is a list of essential materials you’ll need, along with their average prices, to help you plan accordingly.
| MATERIAL | AVERAGE PRICE (PER UNIT) |
|---|---|
| Drywall Sheets (4×8) | $10 – $25 per sheet |
| Drywall Nails | $3 – $6 per box |
| Joint Tape | $3 – $5 per roll |
| Joint Compound (Mud) | $10 – $25 per bucket |
*Prices may vary according to the regions
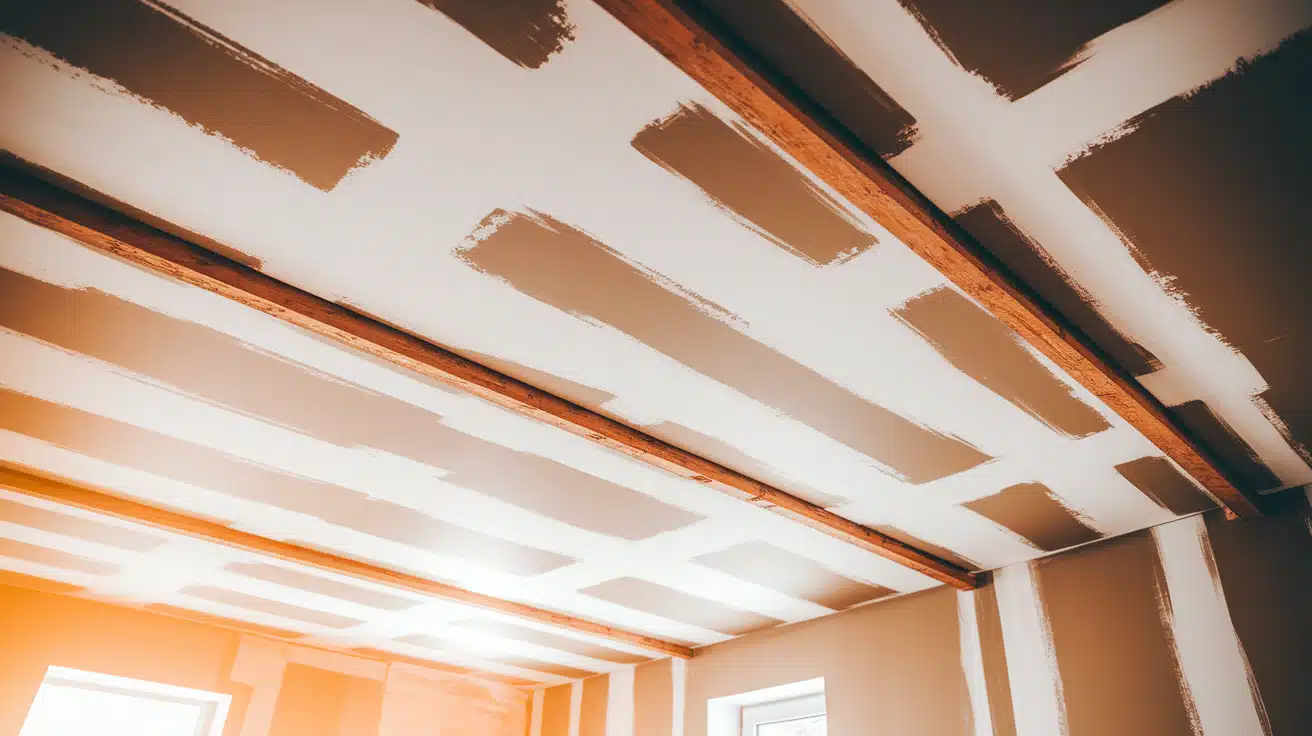
How to Plan the Layout Before Starting?
Before you begin your drywall ceiling project, there are a few key considerations to ensure everything goes smoothly:
- Room Size and Shape: Measure dimensions carefully to determine sheet quantities and arrangement for efficient installation and clean finishes.
- Ceiling Height and Structure: Account for height requirements, scaffolding needs, and structural elements like beams, pipes, or vents that affect layout.
- Type of Drywall: Choose moisture-resistant drywall for bathrooms/kitchens, standard for other rooms, or specialized soundproofing options as needed.
- Direction of Installation: Run sheets perpendicular to ceiling joists for better support and secure fastening, though parallel installation works for specific layouts.
- Joint Placement: Avoid placing seams over light fixtures or vents; position joints between fixtures and stagger seams when possible for strength.
- Fixture Planning: Measure carefully around lights, fans, and electrical boxes to ensure proper fit without awkward cuts or layout disruption.
Proper layout planning ensures sheets fit together neatly, creating a stronger and visually appealing ceiling installation.
Steps for Installing Drywall Ceilings
Installing drywall on your ceiling might seem like a daunting task, but with the right approach, it can be a manageable DIY project.
By following a clear step-by-step process, you can achieve a professional-looking result while saving time and money.
Step 1: Positioning the First Sheet

Positioning the first drywall sheet is a crucial step to ensure the rest of the installation goes smoothly.
- Start at the Center: To ensure your drywall layout is centered and symmetrical, begin installing the first sheet at the center of the ceiling. This helps distribute the weight evenly and reduces the risk of gaps or misalignment.
- Perpendicular to the Joists: Drywall sheets are typically installed perpendicular to the ceiling joists for better support. This arrangement ensures that the sheets are securely fastened to the joists and reduces the risk of sagging.
- Leave a Gap for Expansion: Leave a small gap (about 1/4 inch) between the edge of the drywall sheet and the wall. This gap accounts for expansion and contraction due to changes in temperature and humidity.
Step 2: Securing the Drywall
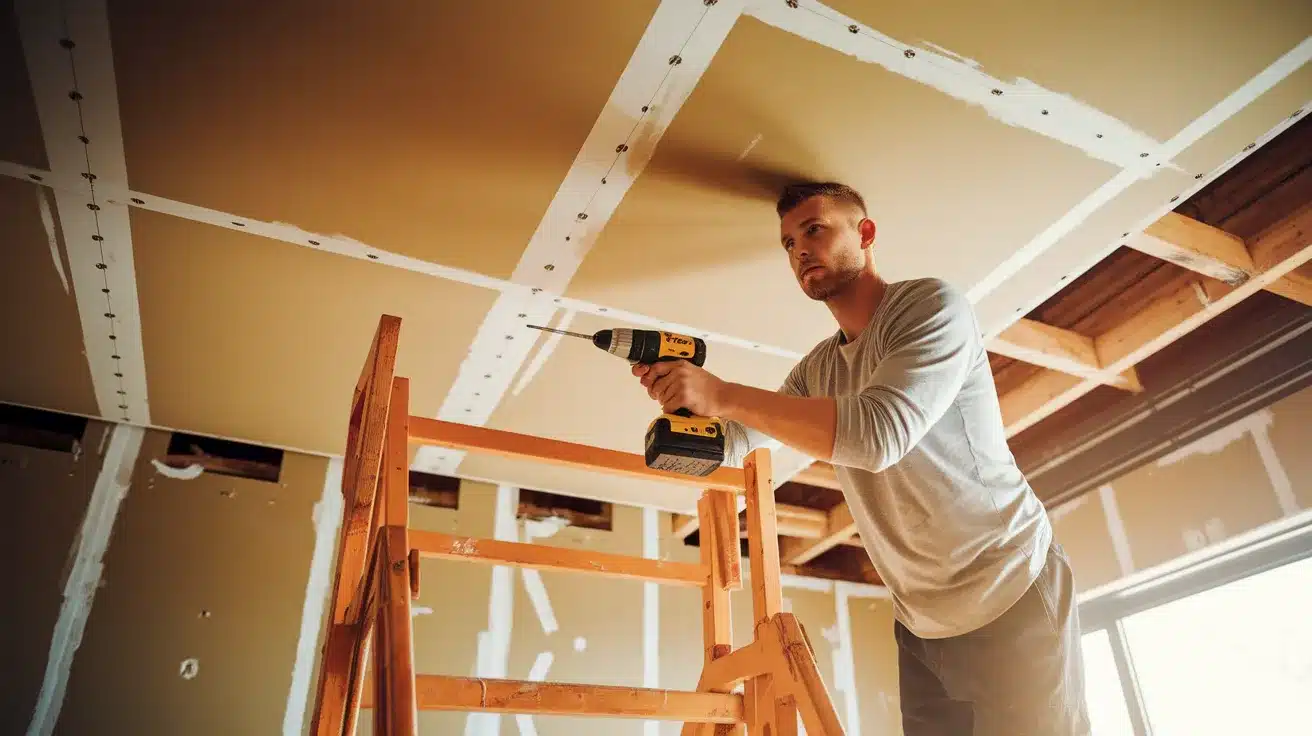
Once your drywall sheet is in position, it’s time to secure it to the ceiling.
- Use a Drywall Lift or Helper: Drywall sheets can be heavy and hard to hold in place, especially on the ceiling. A drywall lift is a tool designed to help lift and hold the drywall sheets in position while you secure them.
- Screw Placement: Drive drywall screws into the ceiling joists every 12 inches along the edges and about 16 inches apart in the middle of the sheet. Screws should be driven straight into the joists to ensure a secure hold.
- Screw Depth: Make sure the screws are slightly below the surface of the drywall, but not so deep that they puncture the paper layer. The goal is to create a small dimple in the drywall that can be filled with joint compound.
Step 3: Cutting and Fitting Sheets
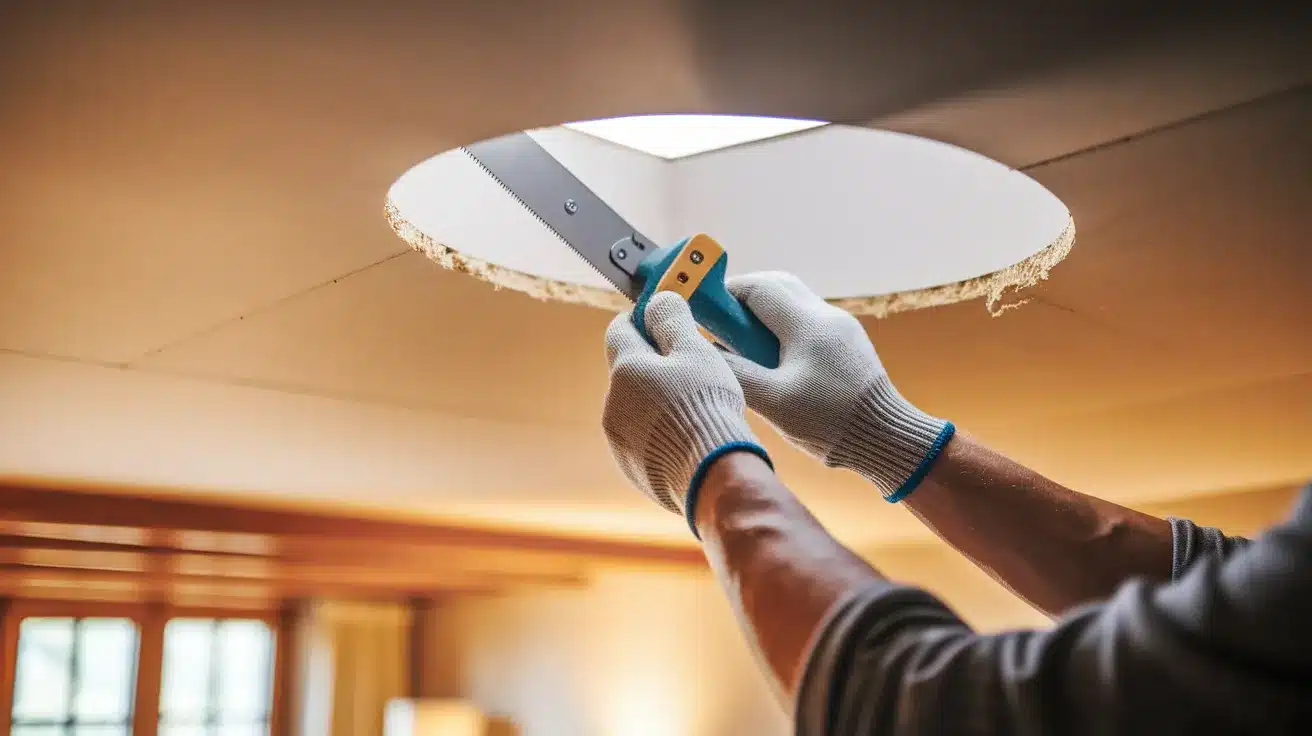
Sometimes, your drywall sheets will need to be cut to fit around beams, vents, or other ceiling elements. Here’s how to handle cutting and fitting:
- Cutting Around Obstructions: When you reach an obstacle like a beam, pipe, or light fixture, use a utility knife or a drywall saw to make precise cuts. Pipes or outlets, use a drywall saw to make more detailed cuts.
- Ensure Clean Cuts: It’s important to make clean cuts to avoid uneven edges. If the cut is jagged or rough, it can make the installation look unprofessional and may cause problems when finishing the seams.
- Fitting the Sheets: After cutting, dry-fit the drywall to make sure it fits properly around the obstacles. Make sure the edges meet neatly and that there are no gaps that could cause issues during finishing. If necessary, trim the sheet further to ensure a snug, clean fit.
Step 4: Taping and Mudding Seams
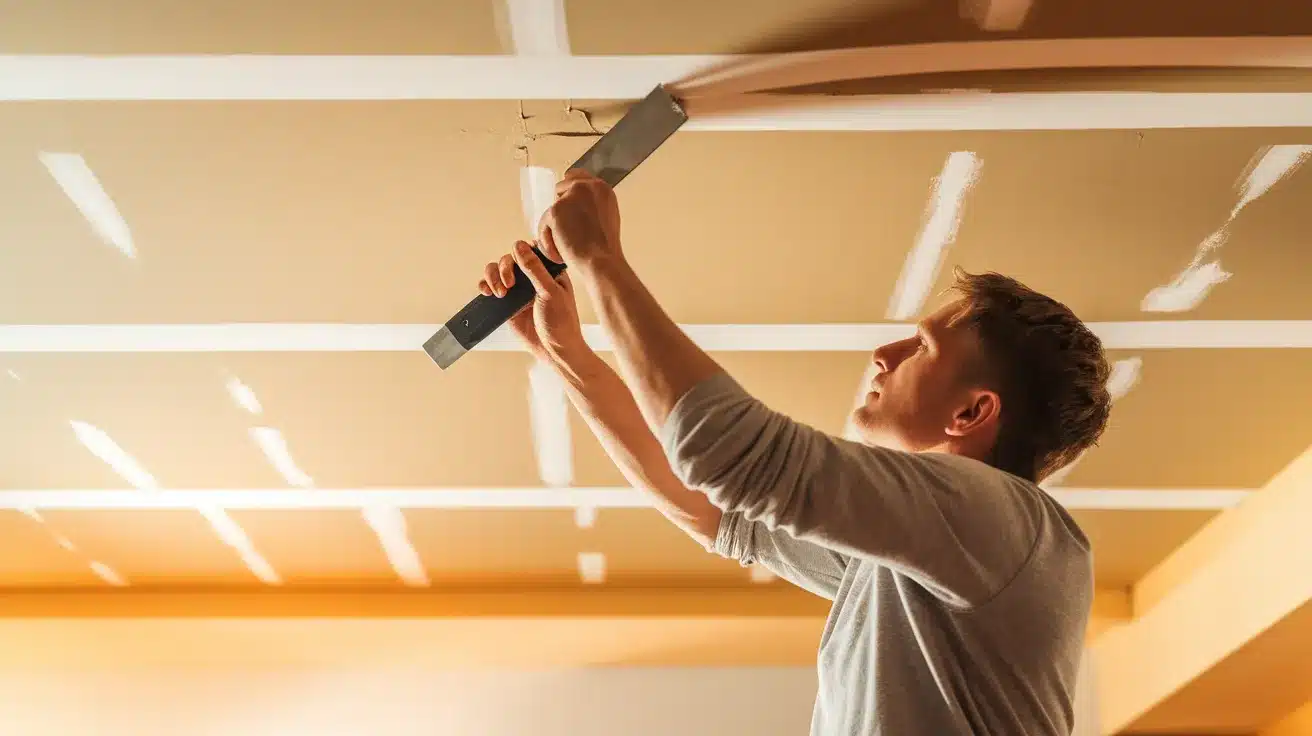
After your drywall is securely installed, the next step is to hide the seams where the drywall sheets meet. This is done by taping and mudding the seams.
- Taping the Seams: Start by applying drywall joint tape along each seam. The tape helps hold the mud in place and ensures the joints stay secure. You can use either paper tape or fiberglass tape, but paper tape is more commonly used for a strong bond.
- Applying the Mud (Joint Compound): Use a drywall knife to spread a thin layer of joint compound (mud) over the tape. Make sure the mud covers the tape completely and is spread smoothly. Apply it evenly along the seams, and try to smooth out any lumps or bumps.
- First Coat: The first coat of mud doesn’t have to be perfect; its job is to seal the tape and fill in the seams. Let the compound dry for several hours or as instructed, depending on the type of mud you use.
Step 5: Sanding and Finishing Techniques
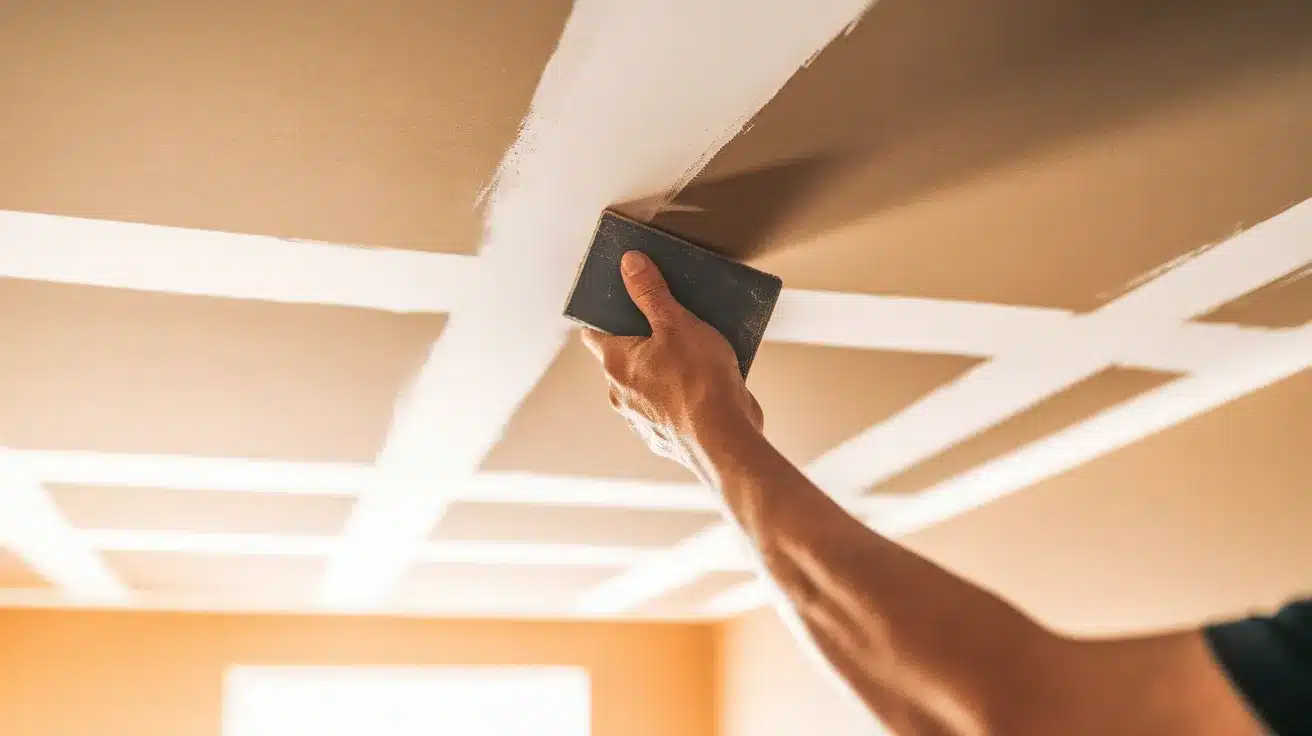
Once the mud has dried, it’s time to sand and smooth everything out to create a flawless finish.
- Sanding: Once the mud is dry, lightly sand the surface using fine-grit sandpaper or a sanding block. Sanding smooths out any rough spots or bumps and helps blend the seams into the rest of the ceiling. Be gentle—sanding too hard can damage the mud or create gouges.
- Apply Additional Coats of Mud: After sanding, you may need to apply additional coats of mud to fill in any imperfections or to make the seams less visible. Each new coat should be thinner and wider than the last. After applying each coat, let it dry and sand it again.
- Final Touches: Once the final coat is dry and smooth, give it a final sanding to ensure the surface is perfectly flat and smooth. Clean off any dust from sanding before painting or finishing the drywall.
Tips for a Successful Drywall Ceiling Layout
Planning a drywall ceiling layout can be easier with these essential tips to ensure a smooth, strong, and professional finish:
- Measure precisely and clearly mark reference lines.
- Use a chalk line for straight and visible guides.
- Place drywall panels to minimize seams in visible areas.
- Stagger joints between panels to increase strength.
- Follow proper fastening and spacing to avoid sagging.
Following these tips will help you achieve a flawless drywall ceiling that lasts and looks great.
Wrapping It Up
A well-planned drywall ceiling layout is essential for achieving a flawless and visually pleasing ceiling.
Paying attention to measurements, panel placement, and alignment not only ensures structural integrity but also minimizes material waste and reduces installation time.
By following the right steps and best practices, both DIYers and professionals can create ceilings that look smooth and durable.
Careful planning and execution of the drywall ceiling layout set the stage for a successful project and a beautiful finished space that enhances any room’s overall appeal.


