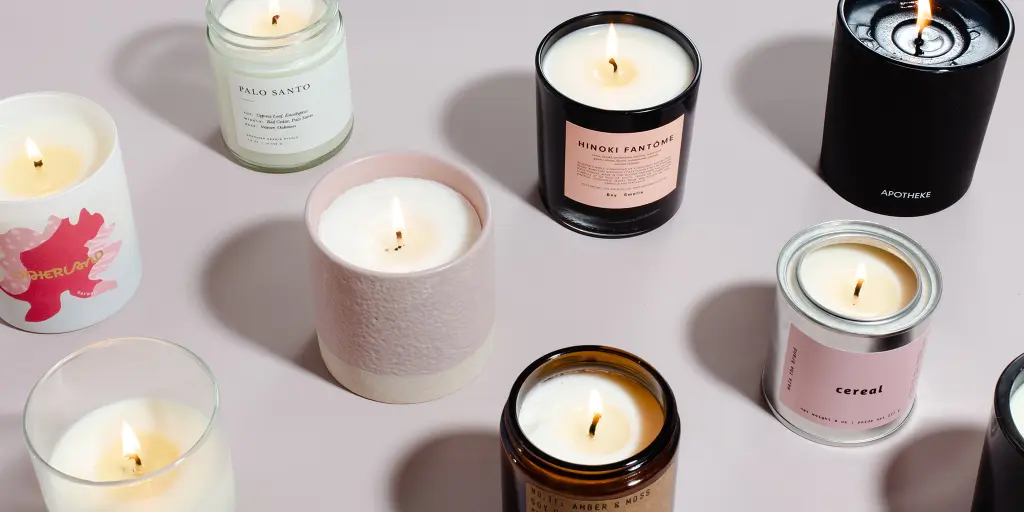
Light Up Your Space with DIY Candle Making Techniques & Tips

Have you ever wondered how those beautiful and soothing candles are made? Well, these candles are made of wax. Candles are like small, lovely lights that can make your space feel warm and welcoming.
Whether you’re aiming for a relaxing vibe or a pinch of glamour, homemade candles can do the trick. You can make your own candle in different colors to match your style, making your space smell fantastic and look inviting.
Making your own candle is not only a delightful activity but also a practical one. You can place them around your home to create a soothing atmosphere or to light up a special occasion.
You can even give them as thoughtful gifts to your friends and family. Natural candle crafting is a simple process that involves melting wax, adding scents and colors, and letting it all set in a mold. Here, we’ll walk you through the steps of making your own candles.
So, gather your materials, and let’s start the art of making attractive candles!
What Candle Wax is Best?
When thinking about making your own candle using DIY candle making and Candle making tutorials, choosing the right candle wax or Candle Making Kits is important. There are two main types, paraffin and soy wax. Paraffin is often picked because it’s cheaper, but it can release some chemicals when it’s lit.
On the other hand, soy wax, included in many Candle Making Kits, is natural and breaks down easily, releasing fewer bad things into the air. Another option to think about is beeswax, which gives off a nice smell when it burns. Each wax type, including those found in Candle Making Kits, has its own special qualities that affect how the scent spreads by Scented homemade candle, how long it burns, and how the candle looks overall.
If you’re into being eco-friendly, soy wax is a good choice to make your own candle, while beeswax adds a pinch of luxury. Figuring out what you like will help you choose the best wax or Candle Making Kits for the candles you’re making by hand.
Is it Cheaper to Make Your Own Candle?
If you want to save money, DIY candle-making could be a great option. It might seem a bit costly at first because you’ll need things like a Wax Melting Kit, wax, fragrance oils, wicks, and containers. However, if you buy these items in larger quantities, you’ll end up spending less over time.
Each Candle making tutorial might be difficult initially, but if you make your own candle more at once, the average cost per candle decreases. This is where Natural Candle Crafting and Beginner Candle Maker Tips become helpful; they provide guidance.
What’s even more exciting is that when you make your own candle, you can choose the scents and how they look. This makes your candles unique compared to store-bought ones. So, not only can you save money with DIY candle making, but you can also showcase your creativity.
You Can Choose Your Candle Scents
When you make your own candle, you get to pick how they smell. This means you can make your room smell like things you like, such as flowers, fruits, or even cookies. It’s like choosing your favorite perfume for your room.
You mix special oils with the wax to create the smell you want. So, if you love the scent of fresh apples or pleasing lavender, you can make your Scented homemade candle smell just like that. It’s a fun way to have your space smell exactly how you like it.
Customize the Color of Your Candles

Making your own candles also lets you decide what colors they should be. You can choose colors that match your room or your favorite colors. It’s like painting with wax. You add special dyes to the melted wax before pouring it into the candle mold.
If you want a bright red candle or a soothing blue one, it’s all up to you. This way, you can make your own candle that not only smells great but also look beautiful and match your style. So, whether you want a rainbow of colors or a single gorgeous shade, customizing your candle colors is a fantastic way to express yourself.
Steps to Make Your Handmade Candles
Step 1: Preparing Containers and Supplies
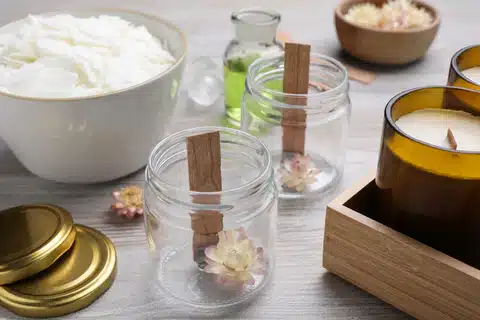
If you’re just starting as a beginner candle maker, here are some tips to help you out. Before you begin making your scented homemade candle, you need to get everything ready with a Candle Making Kit. First, get candle containers or molds that you’ll use to shape your Natural candle crafting, such as jars, tins, or molds made from materials that can handle the heat; they are perfect for this.
Also, make sure to have wicks in stock. Choose wicks that match the size of your chosen container. Wicks come in various thicknesses, so make sure to choose the right one for your candle size while making your own candle.
Step 2: Measuring the Wax

Next comes the wax, the heart of your candle. Measure the wax flakes or blocks you’ll need based on the size of your container. A kitchen scale can be quite handy for precise measurements.
Additionally, a double boiler would be essential for melting the wax evenly. Soy wax, paraffin wax, or beeswax are popular choices, each with its characteristics. Consider using a microwave-safe container to melt the wax if you don’t have a double boiler.
Step 3: Melting the Wax

Now it’s time to melt the measured wax using suitable tools and equipment. If you’re using a double boiler, fill the lower pot with water and place the wax in the upper pot. Gently heat the water, causing the wax to melt.
Microwave melting involves heating short bursts, stirring in between, until the wax transforms into a smooth liquid. For this step, having the right tools, such as a microwave-safe glass bowl or a double boiler set, is important. Maintain a safe temperature to prevent overheating. Once the wax is melted, you can pour it into your chosen candle molds to make your own candle shapes.
Step 4: Adding Fragrance Oils

Combine your candle with delightful scents and fragrance oils to make a Scented homemade candle. Once your wax is molten, carefully measure and pour in the desired amount of fragrance oil using a glass measuring cup. The amount will depend on the type and strength of the oil, as well as your personal preference for scent intensity. Stir well to ensure an even distribution of the fragrance. Be cautious not to overdo it, as too much oil can affect the candle’s burning performance.
Step 5: Attach the Wick

To start making your own candle, the first step is to attach the wick. The wick is like the candle’s backbone, helping it burn steadily. Choose a wick that matches your candle’s size for optimal burning.
Using a Hot Glue Gun, place the wick at the center of the container you’ll use for the candle. You can also use a bit of hot glue or a wick sticker to secure the wick’s metal base to the bottom of the container. Make sure the wick stands upright and doesn’t tilt.
Step 6: Pour the Wax
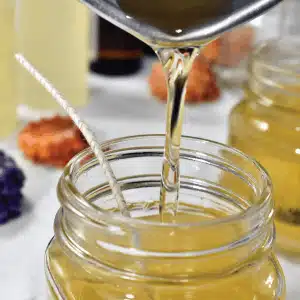
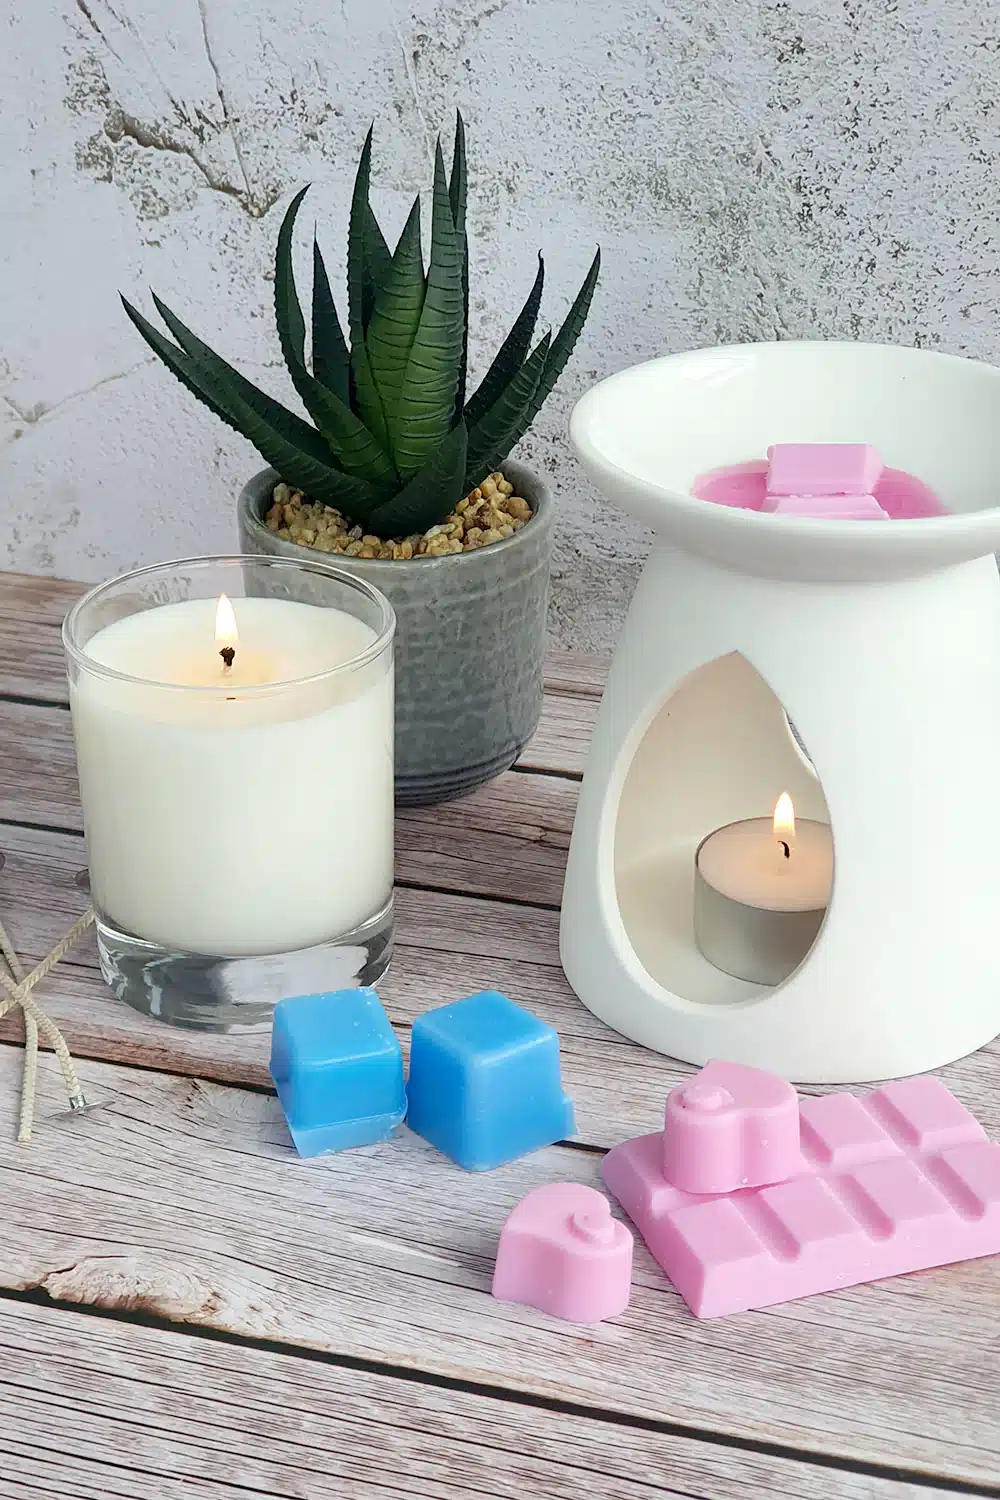
Now it’s time to pour in the wax. Pick the type of wax that suits your preference soy, beeswax, beeswax sheets, or paraffin. Melt the wax using a double boiler or a microwave, but be cautious with the heat.
When making your own candle, you can add any color dye and fragrance oil to give your candle a personal touch. Carefully pour the melted wax into the container with the attached wick. Leave a bit of space at the top. Let the candle cool down, and this might take a few hours.
Step 7: Let Your Wax Set
Making your own candles is a delightful process that starts with choosing the right wax. Go for soy wax, beeswax, or paraffin, all easily available. Melt the wax using a double boiler, wax melting pitcher, or microwave, ensuring a smooth consistency. Once melted, add preferred fragrance oils or essential oils for a lovely aroma.
Allow the wax to cool slightly before pouring it into chosen molds. Patience is key here; let the wax set for a few hours. This step ensures the candle takes its proper shape and burns evenly.
Step 8: Clean Them Up

After your candles have set, they might have some uneven tops or air bubbles. To achieve a polished look, gently tap the molds to release any trapped air and even out the surface. If needed, you can reheat leftover wax and pour a thin layer to level out the tops. Once the Candle making tutorials are fully set and firm, carefully remove them from the molds.
For a smoother finish, consult a Candle Making Bookor Guide and learn techniques to improve your candle-making skills. Smooth out any rough edges using a butter knife or sandpaper, creating a professional finish.
Step 9: Enjoy by Lighting Up the Candles

The final step of making your own candle is the most satisfying moment, lighting your handcrafted candles or LED Tea Lights. Place them on heat-resistant surfaces away from drafts. Trim the wick to about 1/4 inch for a controlled flame when using candles. When lighting, use long matches or a lighter to prevent accidental burns.
As your candles or LED Tea Lights burn, enjoy the flickering ambiance and the soothing aroma you’ve chosen. Remember never to leave lit candles unattended and keep them, or the LED Tea Lights, away from flammable objects. Now you can bask in the warm glow of your DIY candles or the gentle radiance of LED Tea Lights, a true testament to your creativity and craftsmanship.
Conclusion
Now you have all these ideas to make your own candle that can be a wonderful way to bring kindness into your living space. Crafting candles might seem a bit tricky at first, but by following simple steps and using basic materials, anyone can do it.
Homemade candles can be a great addition to your home decor, adding a touch of personal beauty. They come in various shapes, sizes, and scents, so you can choose what suits your style best.
Creating candles isn’t just about aesthetics. It can also be a relaxing and fulfilling activity. The process of melting wax, adding fragrance, and pouring it into molds can be therapeutic and enjoyable.
Once your candles are ready, they can provide a soothing atmosphere and a soft glow to your surroundings. Whether you’re a Beginner candle maker or someone who enjoys DIY projects, making your own candle can be a delightful experience.
So, give it a try and grab the art of candle making. Soon enough, you’ll have a collection of beautiful and fragrant candles that can light up your space.
Frequently Asked Questions
What Materials Do I Need to Make Candles at Home?
To make your own candle, gather wax, wicks, fragrance oils, a double boiler, a thermometer, and containers. Optional tools include color dyes and molds for unique designs.
How Do I Choose the Right Wax for Candle Making?
Choose from paraffin, soy, beeswax, or palm wax to make your own candle. Soy offers a natural option, while paraffin is more budget-friendly. Beeswax burns longer, and palm wax has a unique crystalline appearance.
Can I Add Scents to My Homemade Candles?
Yes, you can make your own candle with scents using fragrance oils or essential oils. Add these during the melting process, ensuring proper mixing for even distribution.
How Can I Add Color to My Candles?
Use candle dye or crayon shavings into your melted wax to achieve desired colors. Experiment with different quantities for lighter or deeper shades.
What’s the Cooling and Curing Process for Homemade Candles?
Allow candles to cool and solidify at room temperature. Cure them for a day or two before lighting to improve the fragrance throw and burn quality and increase your overall candle-making experience.


