How to Hang a Picture on the Wall

Are you ready to find out how to put up pictures on your wall? It’s much simpler than you might think. We’re here to help you with easy steps for hanging pictures like a pro.
Say goodbye to crooked frames or making too many holes; we’ve got your back. Hanging pictures can seem a bit tricky, but we’re going to explain it in simple steps that anyone can do.
Whether you want to show your favorite family pictures or cool art, we’ve got all the tips you need. You don’t need special tools or fancy skills, just some basic stuff you probably already have.
We’ll show you how to measure, mark, and hang your pictures safely and straight. Plus, we’ll share neat tricks to make sure your pictures stay where you want them. If you’re ready to add a personal vibe to your walls and bring your memories or art to life, keep reading.
By the end of these tips, you’ll be a pro in hanging pictures, and your walls will look great. Let’s get started on this easy and fun tip for wall decor.
1. Use Your Phone to Keep Things Straight

When it comes to hanging pictures, your smartphone can be super helpful. If you’ve got a smartphone, that’s great news. Your phone can be a handy tool to make sure your pictures hang straight and nice.
All you need to do is open the level app on your phone (if you don’t have it, you can get one easily). Once you have the app ready, put your phone on top of the picture frame. Then, adjust it until you see a little bubble in the middle of the screen.
So, with your trusty smartphone and the Level app, you won’t need to worry about your pictures looking tilted on the wall. Hanging pictures can be easy and fun with a little help from your phone. If you still have a problem hanging the picture straight, then you can use a tripod and hang the picture perfectly with these ideas and picture-hanging tips.
2. Try Tricks for Organizing Your Tools

Organize your tools before hanging the picture. You’ll need a hammer, nails, hooks, and other stuff. Put them all in a container or on a tray. This will help a lot because you won’t have to look everywhere when you want them. It’s like getting set before a fun thing to do.
Having everything ready is like having a plan. Think about getting ready to make a yummy sandwich. You gather everything you need first, so you don’t have to run around the kitchen while making it.
So, remember to gather your tools before you start hanging pictures. It’s like having a box of magic tricks. When you need a nail, it’s right there.
When you want a hook, it’s waiting for you. These picture ideas make it much easier and more fun. You should have this picture hanging kit, which will keep all things organized for you.
3. Use Rivets for Light Things on Walls
If you want to hang up small and light things like pictures or posters, using special nails from rivets kits can be a good idea. Just hammer the stem of the rivet into the wall, and you can put your item on it.
They’re easy to use and will keep your things in place. Think that you have a neat poster you want to put on your wall. Instead of using regular nails, you can use rivets.
First, gently hit the rivet into the wall with a hammer. It’s like giving the rivet a little push so it stays in the wall. Once it’s in, you can hang your poster on it. Your pictures will stay right there without any trouble.
These are some of the best picture hangers. Just follow the steps and these picture ideas, and you’ll have your pictures or posters up on the wall quickly. It’s like a little project you can do yourself.
4. Make Templates for Screws

Learn how to hang up pictures in an easy way. First, cut a piece of paper in the same shape as your picture frame. Then, mark where you want to put the screws or hooks on the paper.
Next, take the paper template you made and put it on the wall where you want your picture. This will be your guide for placing the screws in the right spots. It helps you hang your picture accurately and ensure it looks good on the wall.
To sum it up, when you’re hanging pictures, start by making a paper template of your picture frame. Mark where the screws or hooks should go on the paper. Tape the paper on the wall and use it as a guide to put the screws in the right places.
Use these picture hanging tips and make the best templates for the screws so that you should not have to face any problems in using pictures of your choice.
5. Nail Through Paper for Accuracy
Here’s a simple and fun way to put up pictures completely hassle-free. You’ll need a piece of paper, some nails, and your picture’s ready to go on the wall. First, stick the paper on the wall where you want your pictures to be. Make sure it’s straight and in the right place.
Then, gently tap a nail through the paper. This helps you know where to put your picture hooks. This cool trick, along with using the digital laser tape measure, keeps your nails on track and stops them from making big holes in the wall. It also helps in hanging artwork where you want it—no more crooked or wrong pictures.
When you’re done tapping the nails through the paper, take the paper off the wall carefully. Now, you’ll see the little nail marks showing where to put your picture hooks. Your pictures will be nicely hung, and you won’t need to worry about extra holes in the wall. This method will be useful if you seek the best picture hangers and wall art hanging techniques.
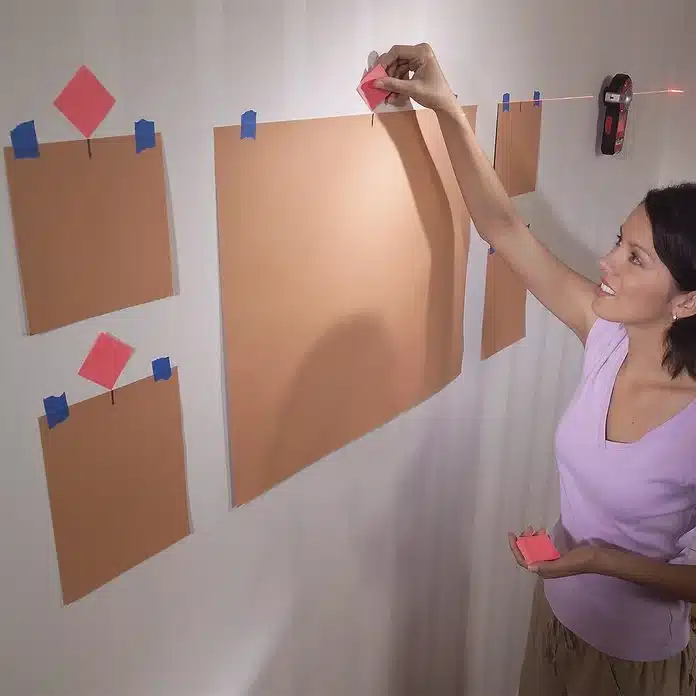
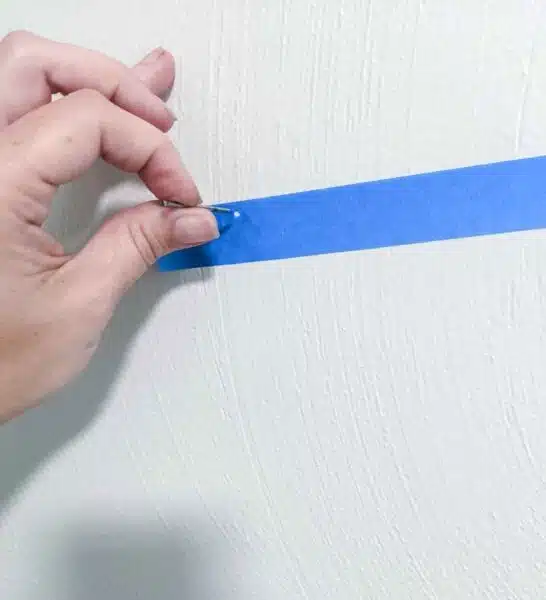
6. Arrange with Paper and Tape

When you want to put up pictures on your wall, here’s a simple way to do it without making any mistakes. First, get some paper and cut it into the same shapes as your pictures. Then, use tape that doesn’t stick too strongly to the wall.
Now, you can put the paper shapes on the wall where you want to hang your pictures. This is like practicing; you can see how everything will look before you start hammering nails or making holes. This trick is great because it helps you plan and decide where each picture should go. If you don’t like how they look in one spot, you can easily move the paper around until you find the perfect arrangement.
Once you’re happy with how everything looks, you can use removable adhesive picture hanging strips as a guide to hang your real pictures. This way, you won’t have to worry about making extra holes with these DIY picture-hanging tips.
7. Mark Holes with Glued Pins

Connect two thumbtacks and press them gently into the wall to mark where you’ll put the sticky screws. This is one of the best DIY picture-hanging ideas. Think that you have a nice painting or a favorite photo you want to hang on your wall.
But how do you know where to put the nails? That’s when these thumbtacks can help. Get two thumbtacks and put them close to each other. Press them into the wall where you want your picture. Now, take a nail and a hammer and tap the nail where those marks are.
Hang your picture, step back, and enjoy your work. Thanks to these handy thumbtacks, your hanging pics will be just where you want them. So, remember, when you’re ready to hang your favorite pictures, don’t forget your thumbtack helpers with these wall art hanging techniques. Glued pins are one of the best picture hangers.
8. Use Toothpaste to Know Where to Nail
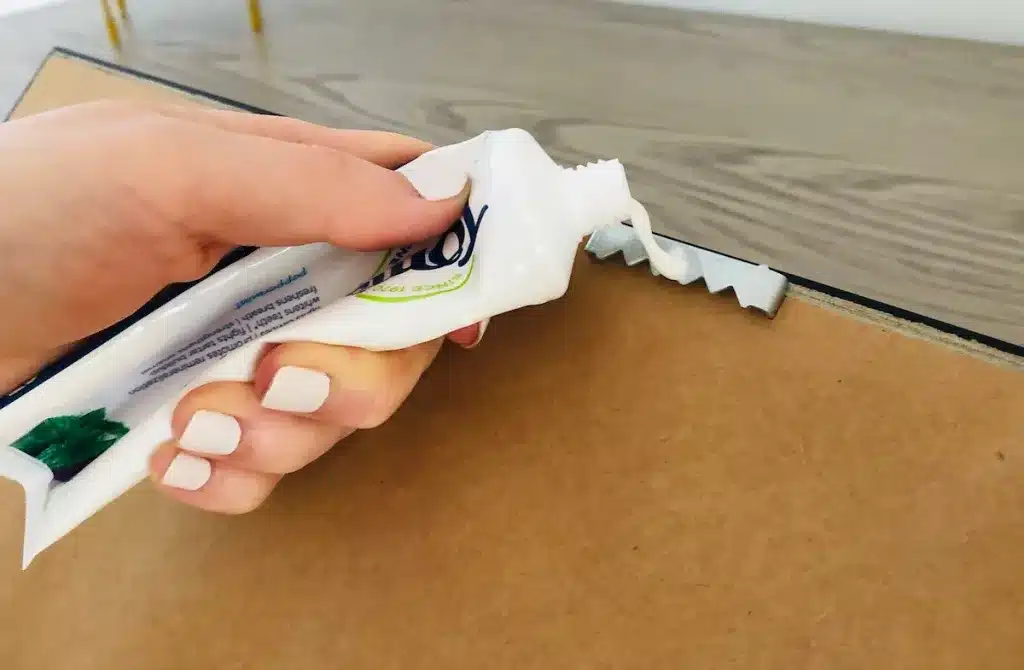
Putting up your hanging pictures nicely on the wall can be easy. Here is a cool trick. When you want to hang a picture frame, first, get your picture frame and a bit of toothpaste. Yes, toothpaste. Put a small dot of toothpaste on the back of the frame where you want to put the nail.
Next, hold your picture frame against the wall where you want to hang it. Gently press it against the wall. The toothpaste will leave a mark on the wall; don’t worry, it’s not forever. This makes it easy to hang your picture frame in the right place.
Put toothpaste on the back of your frame, press it on the wall, and use the mark to guide where to put the nail. This little toothpaste trick takes the guessing out of hanging photos and helps you get it right the first time. Enjoy making your wall look nice.
9. Use Putty to Stop the Tilt

If your picture starts leaning when you hang it, no problem. You can stop it from tilting with a simple trick. All you need is some sticky putty and a few minutes. If you see your picture tilting a bit, take some sticky putty. It’s like soft clay that sticks things together.
Roll tiny pieces of putty into little balls. Now, look at the bottom corners of your picture, the parts touching the wall. Gently press a putty ball onto each corner. Push them on gently so they stick. When you’re done, lift the picture carefully and put it back on the wall where you want it.
The putty balls will help the picture stay straight with these wall art hanging techniques. They work like helpers to keep your picture steady and in place. Remember, when you hang pictures, if you notice them leaning, use some putty on the bottom corners. Your pictures will stay straight, and you’ll be proud of your decorating skills.
10. Hang Shelves Instead of Frames
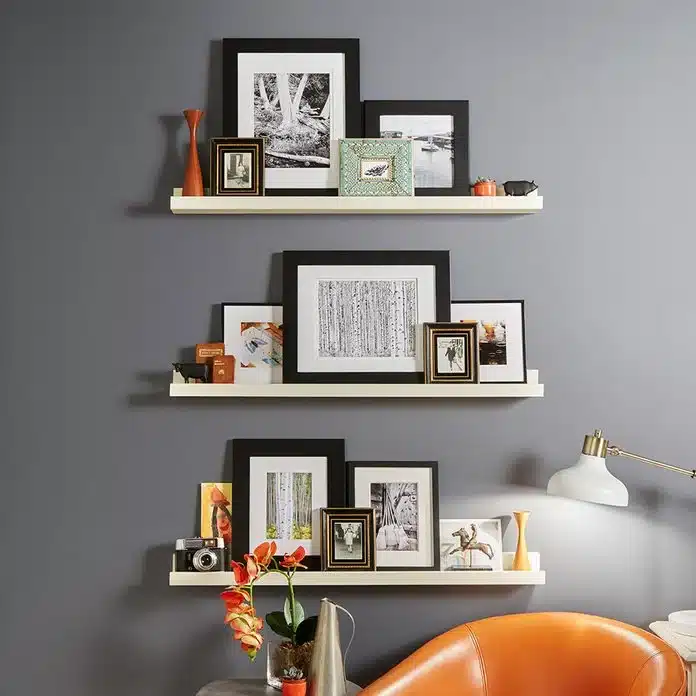
Try hanging shelves instead if you’re tired of regular hanging picture frames. These shelves are a neat way to display your pictures and make your walls look cool using different DIY picture-hanging tips.
They’re really easy to use; hang them up, and you’re ready to show off your pictures. With regular frames, you might have to use nails or sticky stuff that can be messy. But with hanging shelves, it’s as simple as putting your pictures on them. It’s like having a mini art gallery right in your home.
You can mix and match pictures, add small plants, or even put little decorations next to your photos with these picture-hanging tips. If you’re into hanging pics and want to add a fresh and creative vibe to your wall decor, hanging shelves are the way to go. They’re easy, fun, and a fantastic way to give your space a unique vibe.
Conclusion
So, now you’ve got the idea of putting up pictures on your wall. It’s no big deal at all; follow these simple steps, and your pictures will be up in a moment.
Remember, the trick is ensuring your picture is nice and straight. A little level can help with that. And don’t worry about poking too many holes in the wall; it’s easy to change things around if you change your mind.
First, find the perfect spot for your picture. Then, grab a nail or a hook, something sturdy. Gently tap it into the wall, ensuring it’s nice and strong. Next, hang your picture on the nail or hook. Step back and take a look at your awesome work. Hanging photos is a fun way to level up your room.
So, don’t be afraid to give it a shot. With these easy steps, you’ll become a hanging pictures expert quickly.
Go ahead, get creative, and let your walls tell your story.


