How to Make a DIY Chunky Yarn Wreath Easily

Do you really want to uplift your front door or living space with a beautiful chunky yarn wreath that combines modern texture with timeless appeal?
This beginner-friendly project requires minimal supplies and creates maximum impact, perfect for seasonal decorating or year-round display.
In this blog, you’ll learn the exact techniques to achieve that perfectly fluffy texture, simple ways to customize your wreath for any season, and time-saving tricks.
Timeless Charm of Yarn Wreaths
Yarn wreaths are more than just decor; they’re symbols of welcome and hospitality, rooted in centuries-old tradition.
Handmade wreaths add a personal, unique touch that mass-produced options can’t match. Their versatility suits every season, and their reusable nature makes them an eco-friendly choice.
More than decoration, they connect us to generations of artisans, celebrating creativity and craftsmanship in every fold and wrap.
Tools & Materials Required to Make a Chucky Yarn Wreath
Below is the list of materials you will need to make this beautiful decor piece:
- 14-inch wire wreath frame
- Chunky yarn
- 2.5-inch wired ribbon in your choice of patterns
- Hot glue gun and glue sticks
- Scissors
- Pipe cleaners
- Optional: decorative elements for customization
Step-by-Step Guide to Make a Chucky Yarn Wreath
Here’s a list of step-by-step processes that you need to follow in order to make a chunky yarn wreath:
Step 1: Preparing Your Wreath Frame
Begin by removing any stickers or price tags from your wire wreath frame.
Make sure your working surface is clean and covered if needed, as hot glue can sometimes drip.
Examine the frame to identify any sharp edges; these metal frames sometimes have small wire pieces that can poke you during wrapping.
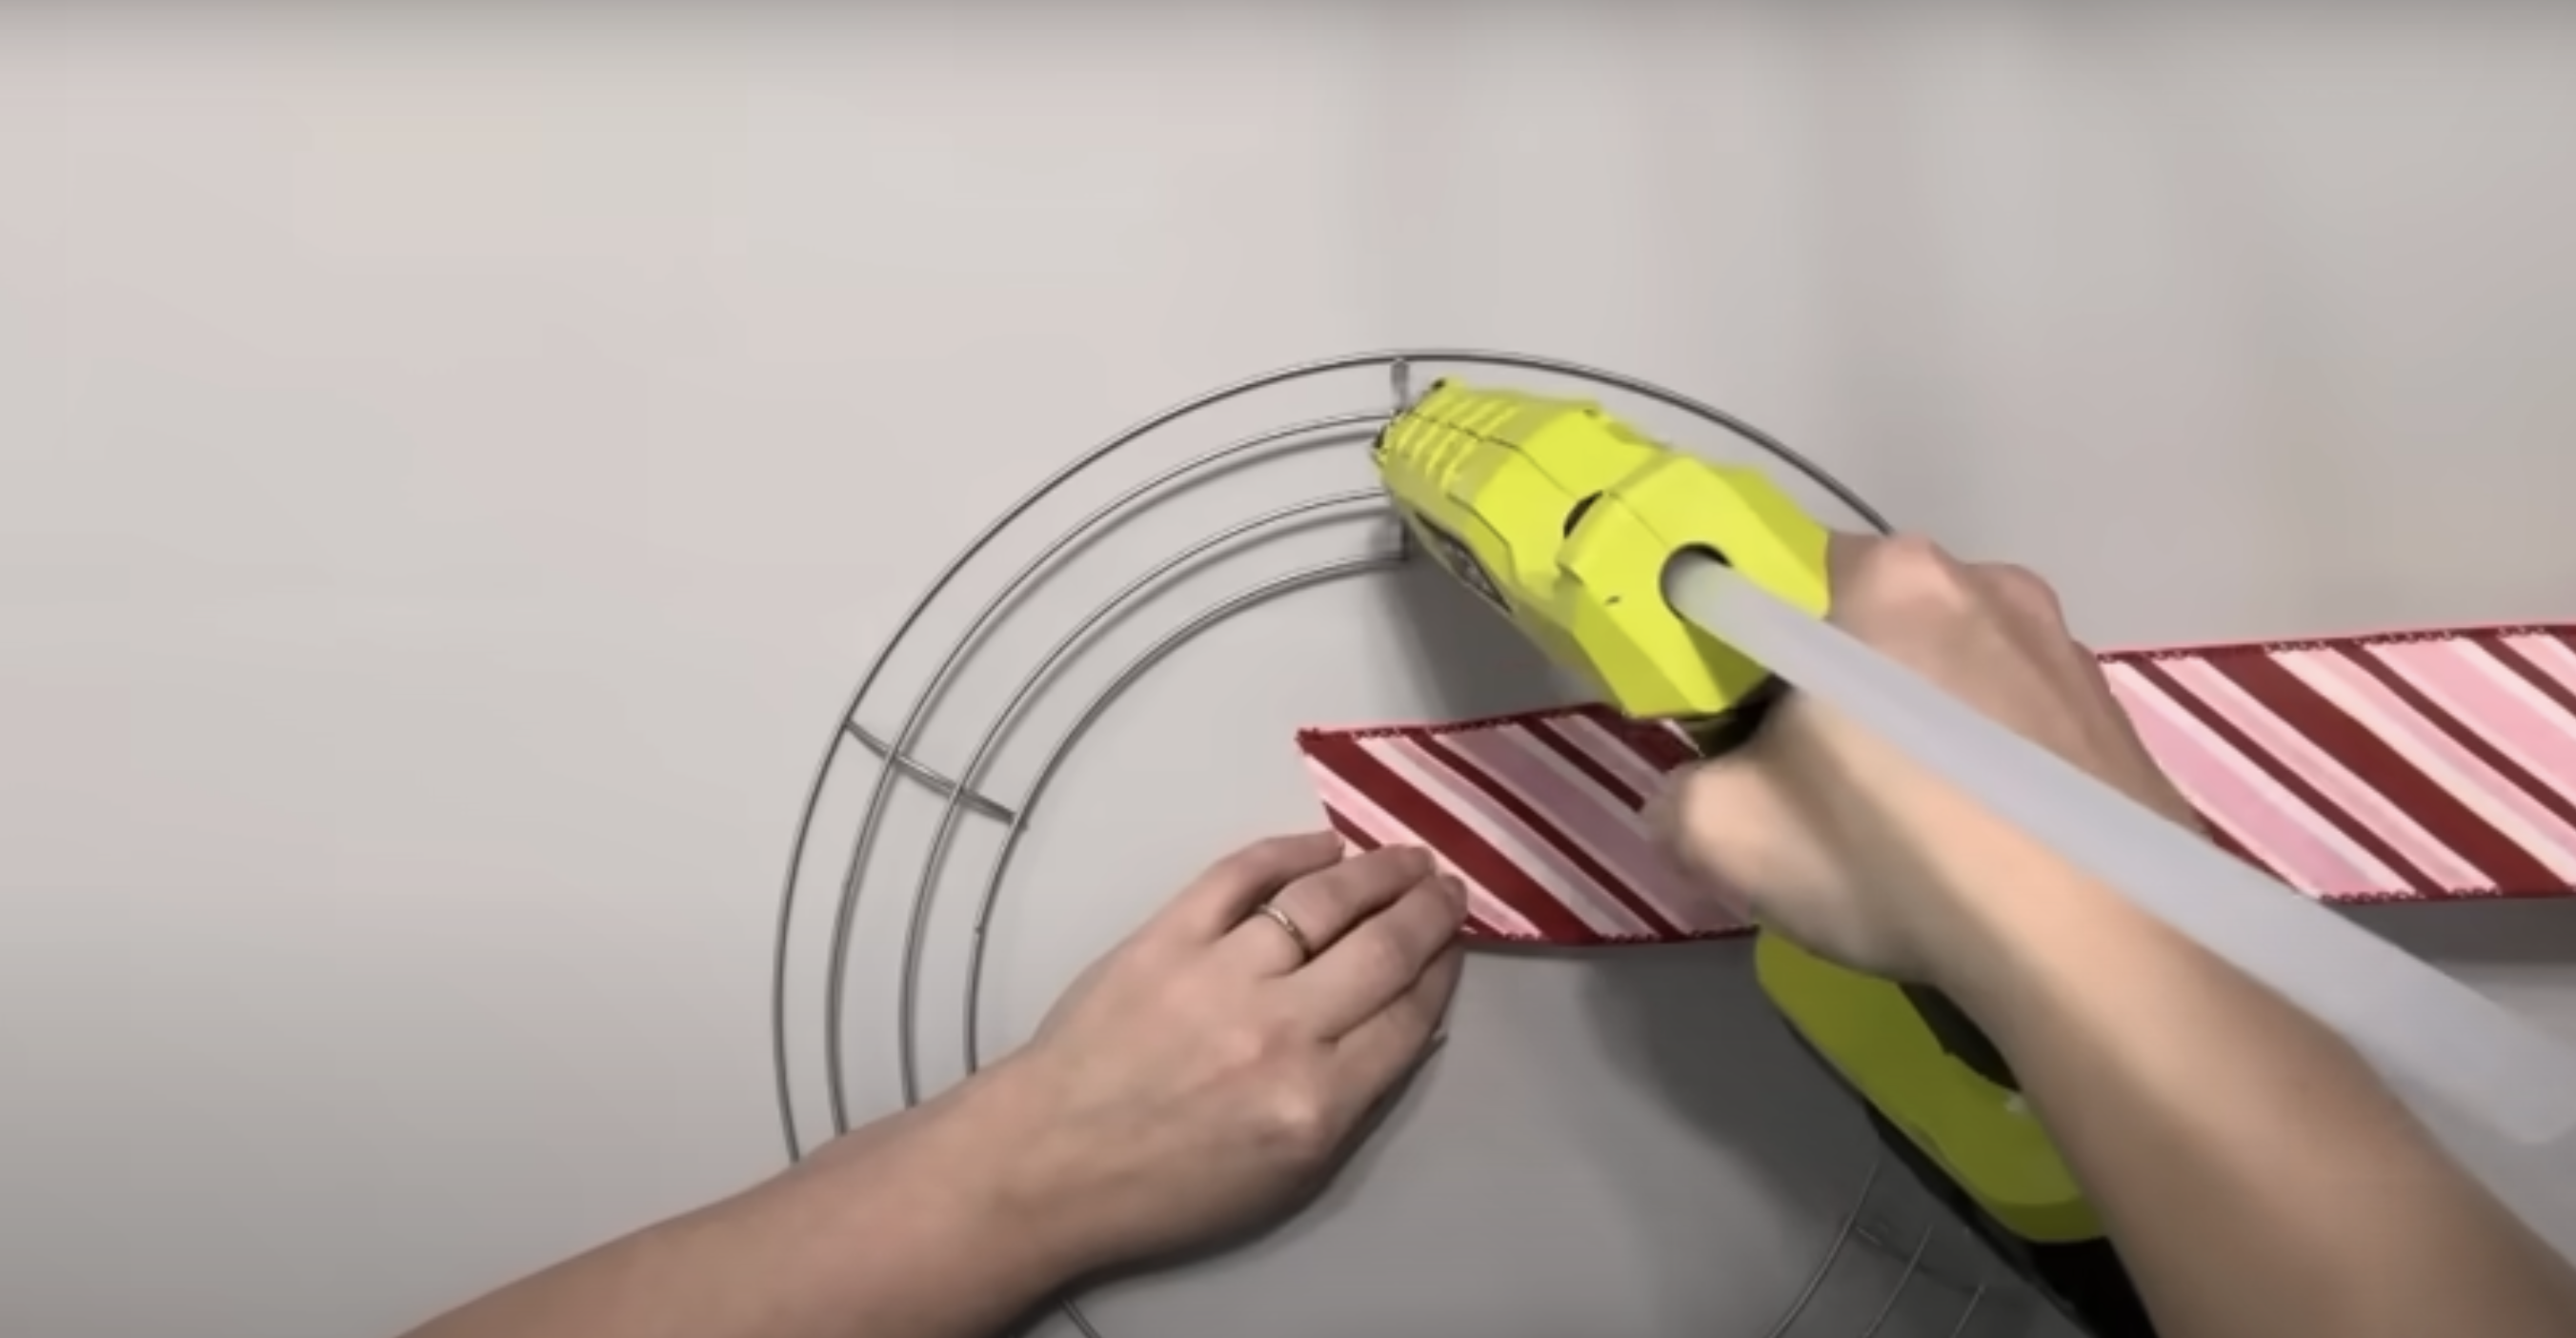
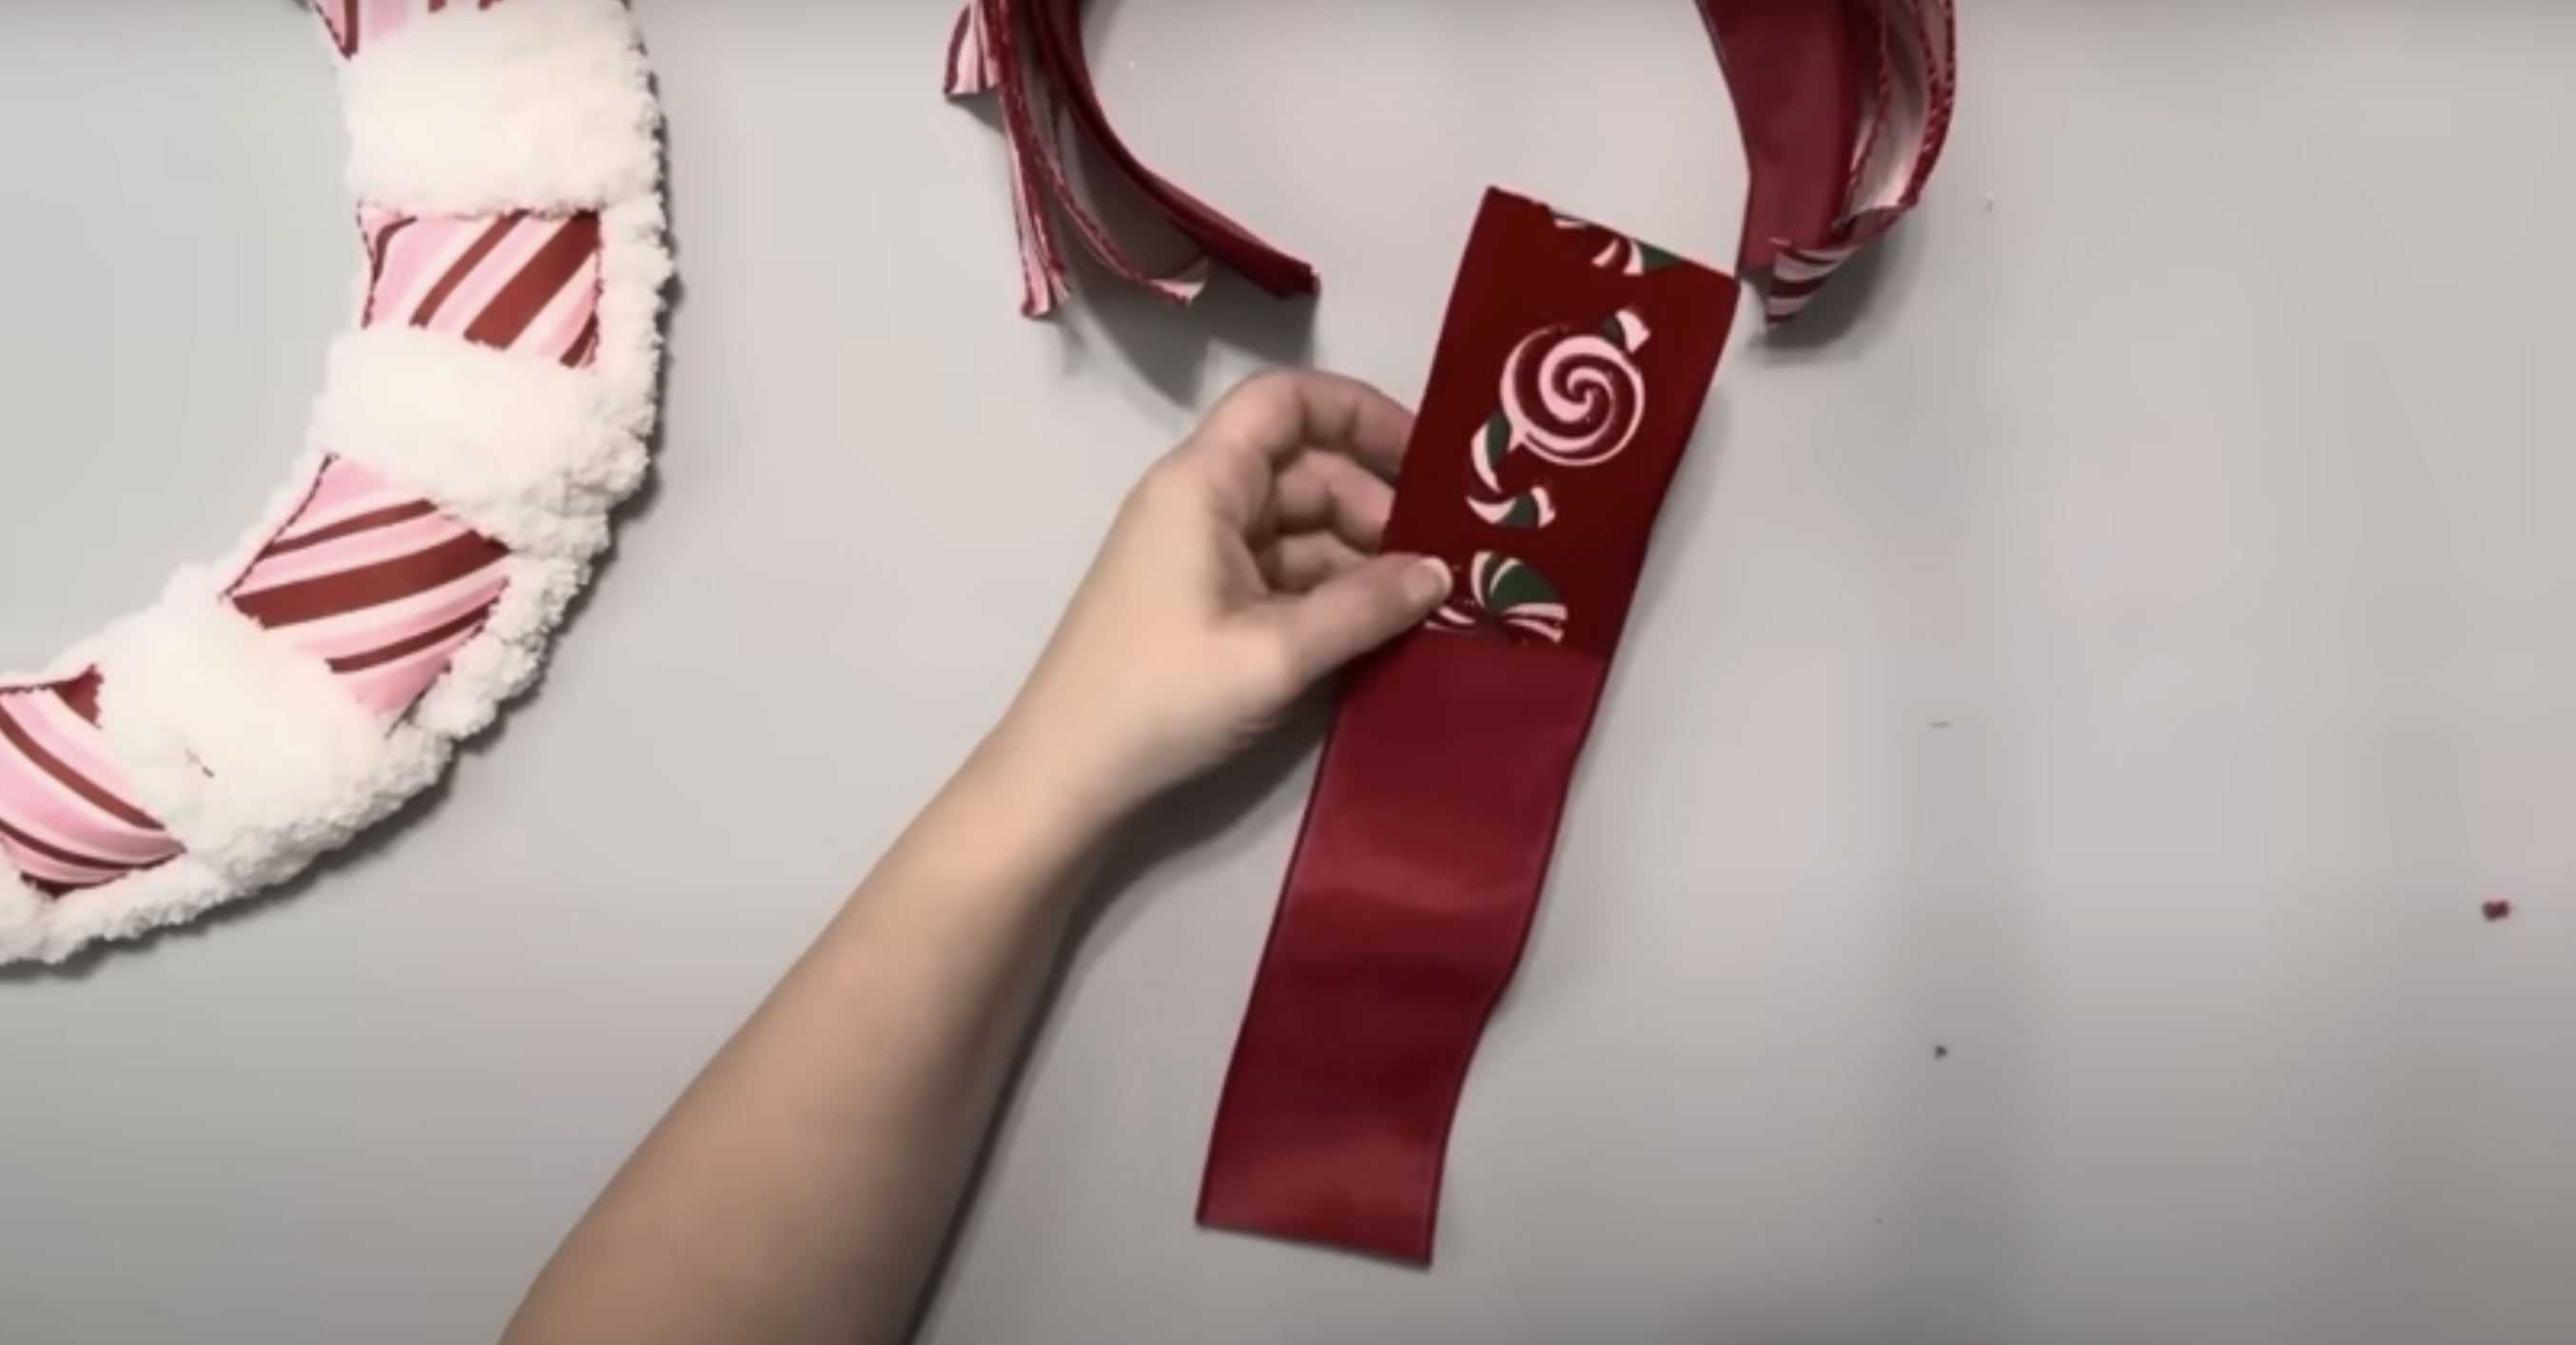
Step 2: Adding the Base Ribbon
Take your wired ribbon and locate the starting point on your wreath frame.
Apply a dab of hot glue directly to the metal frame and press the end of your ribbon onto it, holding for a few seconds until secure.
The ribbon creates a foundation that makes the yarn wrapping easier and more stable.
Make sure the ribbon lays flat against the frame without twisting. The wire in the ribbon helps it maintain its shape as you work.
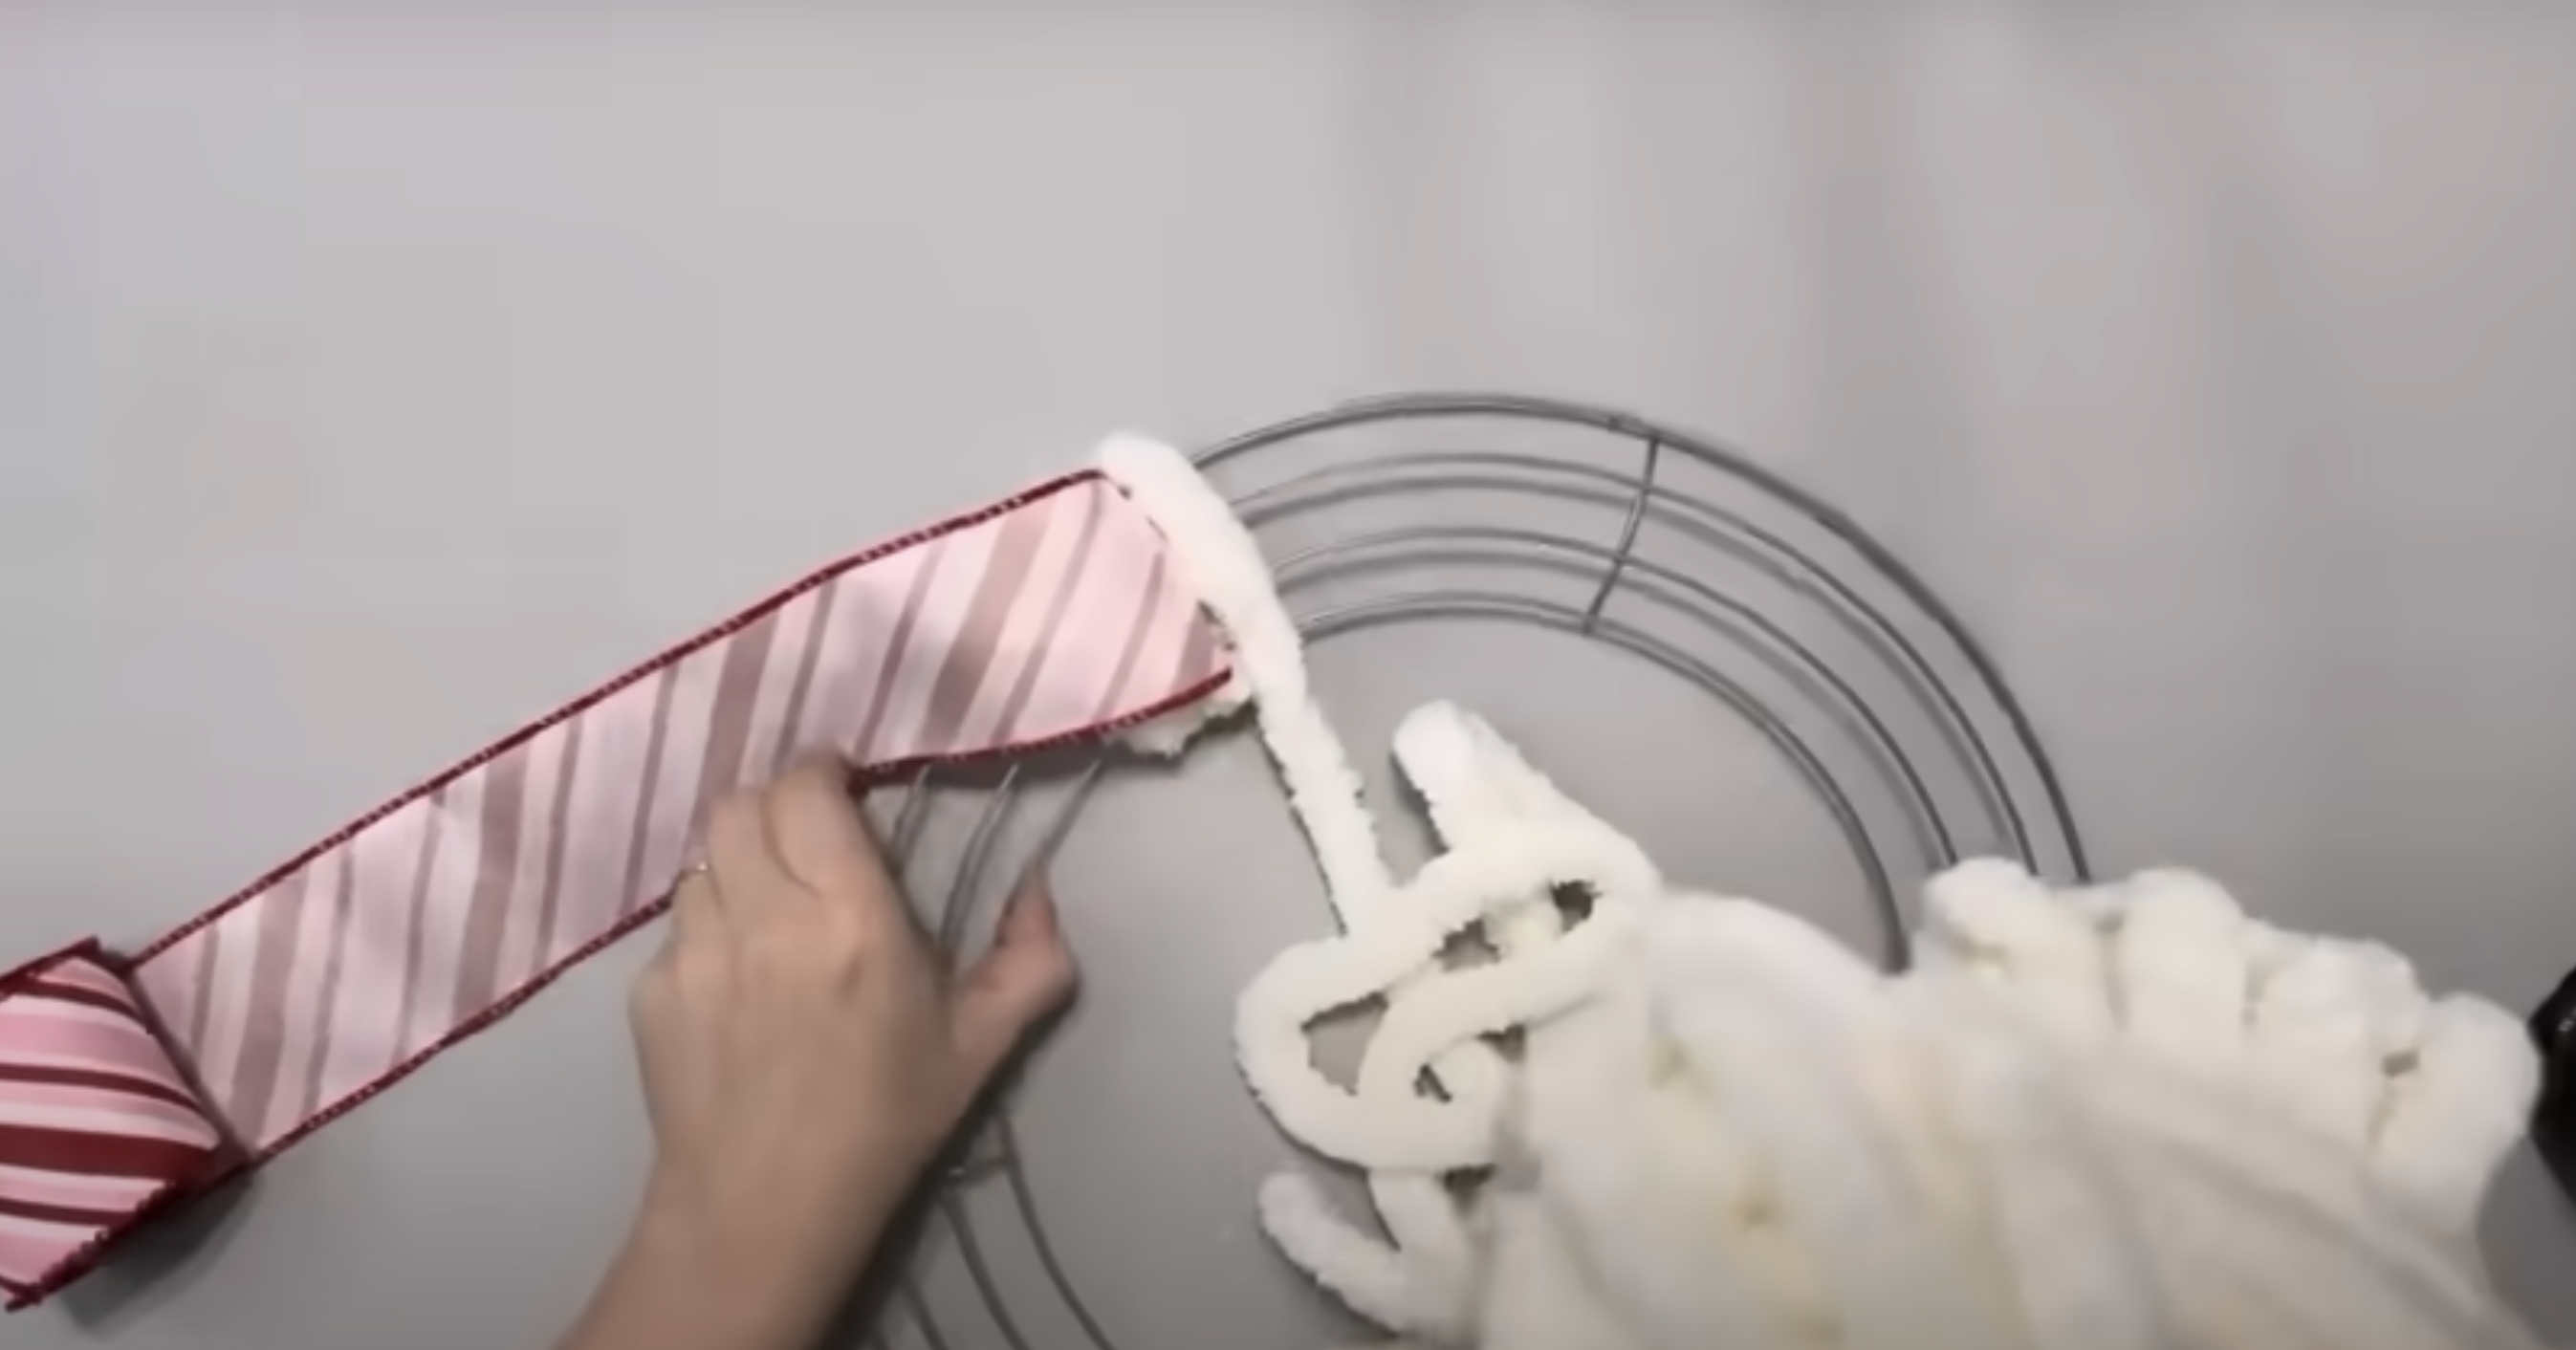
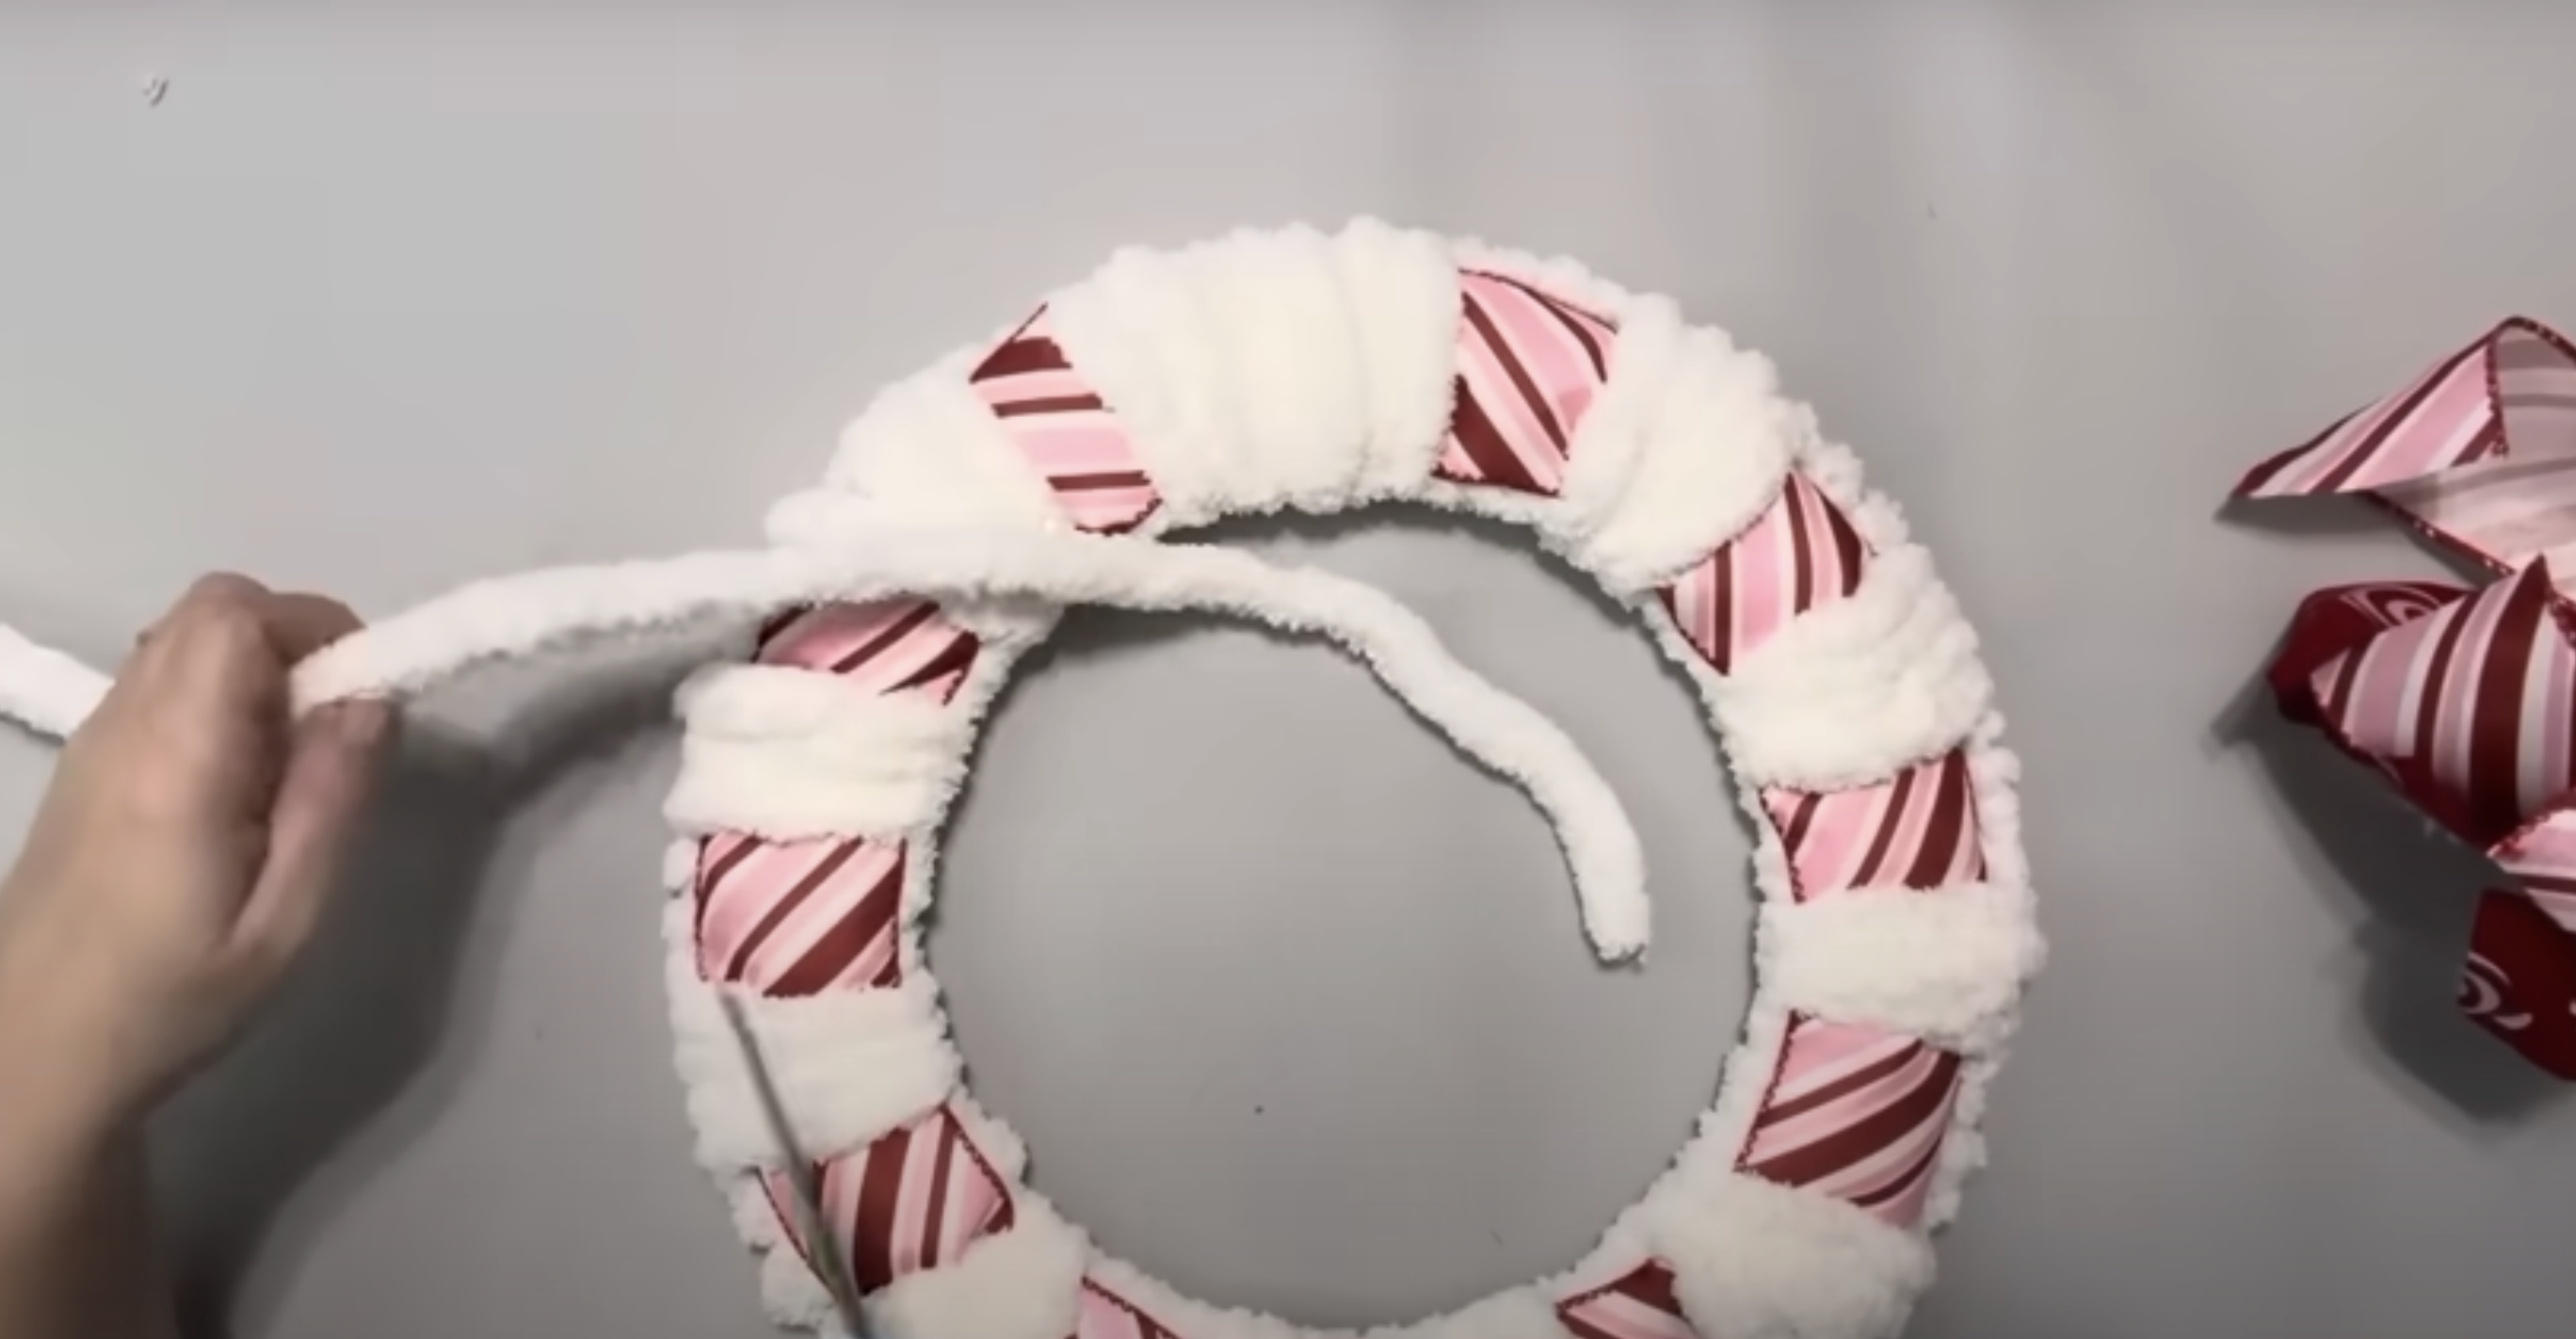
Step 3: Begin the Yarn Wrapping
Now comes the fun part! Take your chunky yarn and apply a small amount of hot glue to the ribbon where you’ve attached it to the frame.
Press the end of the yarn into the glue and hold until secure. Begin wrapping the yarn through the wire frame and around the ribbon.
Count as you wrap. You’ll want to complete four full wraps around this section. The yarn should weave through the frame and cover the ribbon completely.
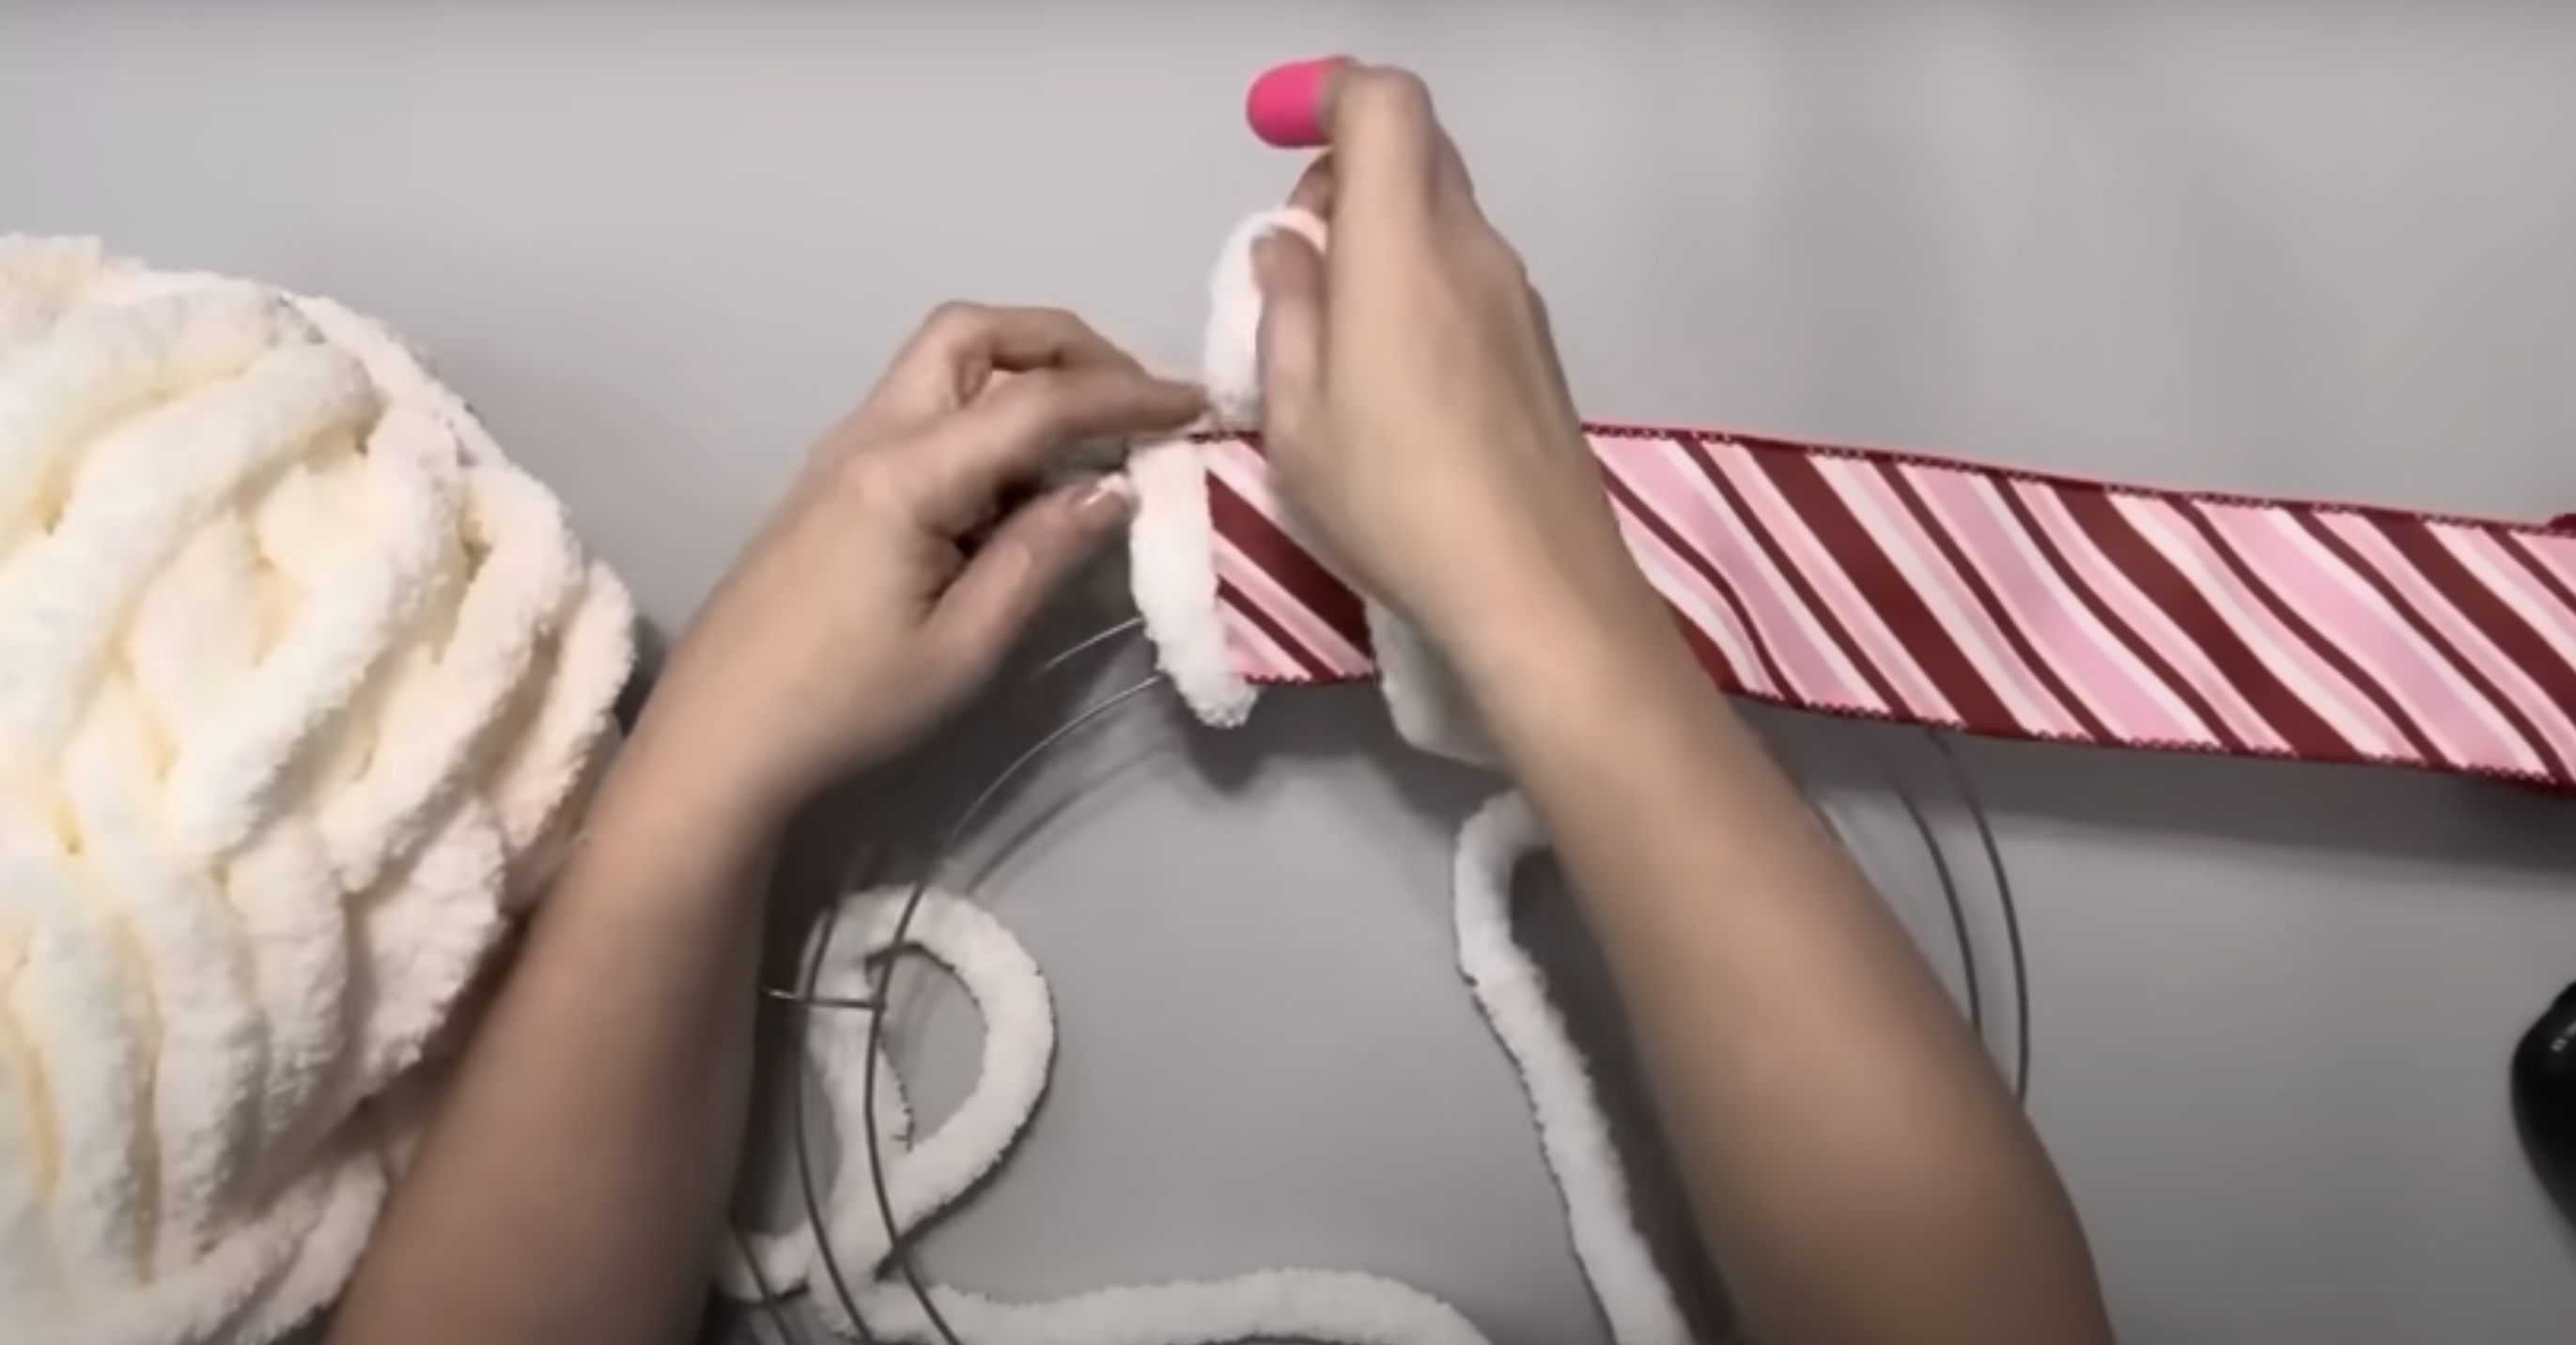
After your four wraps, flip the ribbon over so it’s on the opposite side of the frame. Wrap the yarn four more times directly onto the wire frame underneath where the ribbon now sits.
Then, flip the ribbon back over the yarn and do four more wraps over the top of the ribbon.
Step 4: Continuing Around the Frame
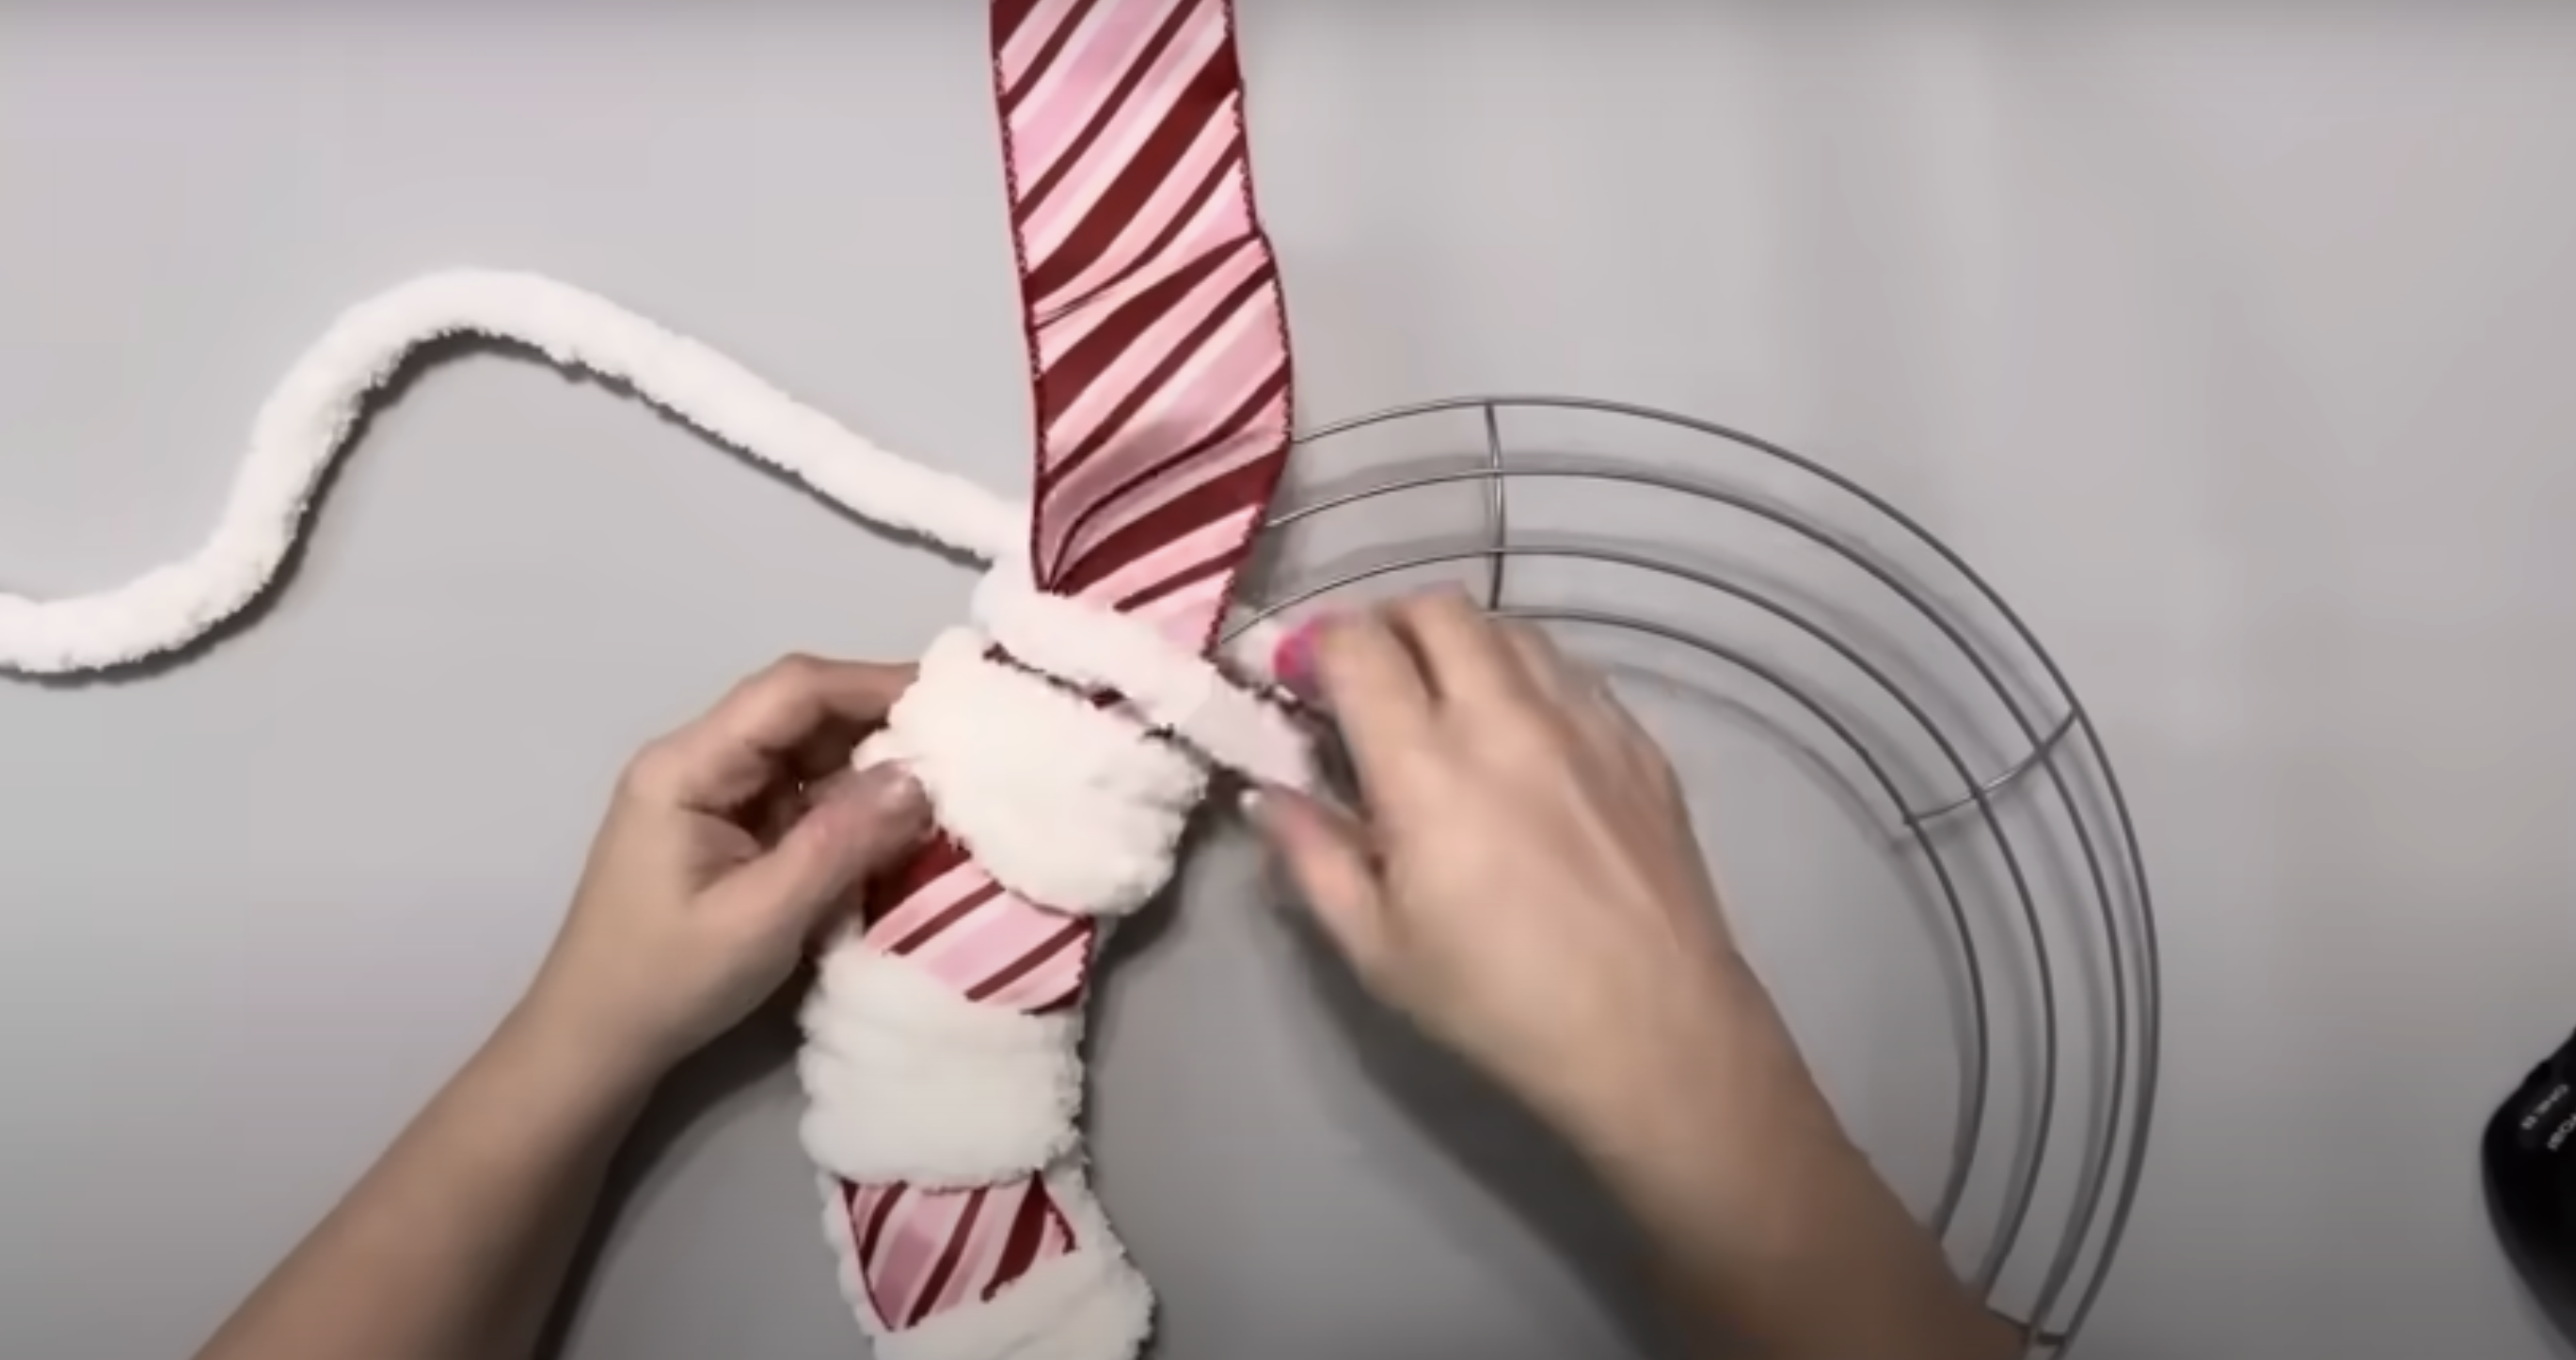
As you continue wrapping around the frame, maintain consistent tension on the yarn. Too tight and your wreath might warp; too loose and it will look uneven.
You want the yarn to be snug but not stretched. Work in sections, completing the 4-over, 4-under pattern before moving to the next section of the frame.
This methodical approach helps keep your wrapping even.
Step 5: Finishing the Yarn Wrapping

When you’re almost back to where you started, it’s time to finish up. Cut the ribbon and secure it with hot glue to the yarn beneath it.
This section will be slightly bulkier than the rest of your wreath, but don’t worry; it’s the perfect spot to place your bow later.
Continue filling in this final section with yarn, maintaining the same wrapping pattern. Once complete, secure the end of your yarn at the back of the wreath with hot glue.
Step 6: Creating a Beautiful Bow
For a professional-looking bow, cut 6 pieces of ribbon, 3 from each pattern, approximately 16-17 inches long.
Take one piece and form a loop about 9 inches in length. Hot glue the ends together, leaving tails extending from the glued portion.
Repeat this process with all 6 ribbon pieces. Once you have all your loops, gather them together where the glue joints are, pinching them tightly in the middle.
Take a pipe cleaner and wrap it around this pinched center, twisting it tightly to secure all the loops together. Leave the ends of the pipe cleaner long for attaching to the wreath later.
Step 7: Adding a Hanger
Before attaching your bow, create a simple hanger for your wreath. Cut a piece of chunky yarn about 10-12 inches long.
Form it into a loop and secure both ends to the back of your wreath at the top with hot glue. Make sure this loop is strong enough to support the weight of your finished wreath.
You may want to reinforce it with extra glue or even wrap the ends around the frame before gluing for added security.
Step 8: Attaching the Bow
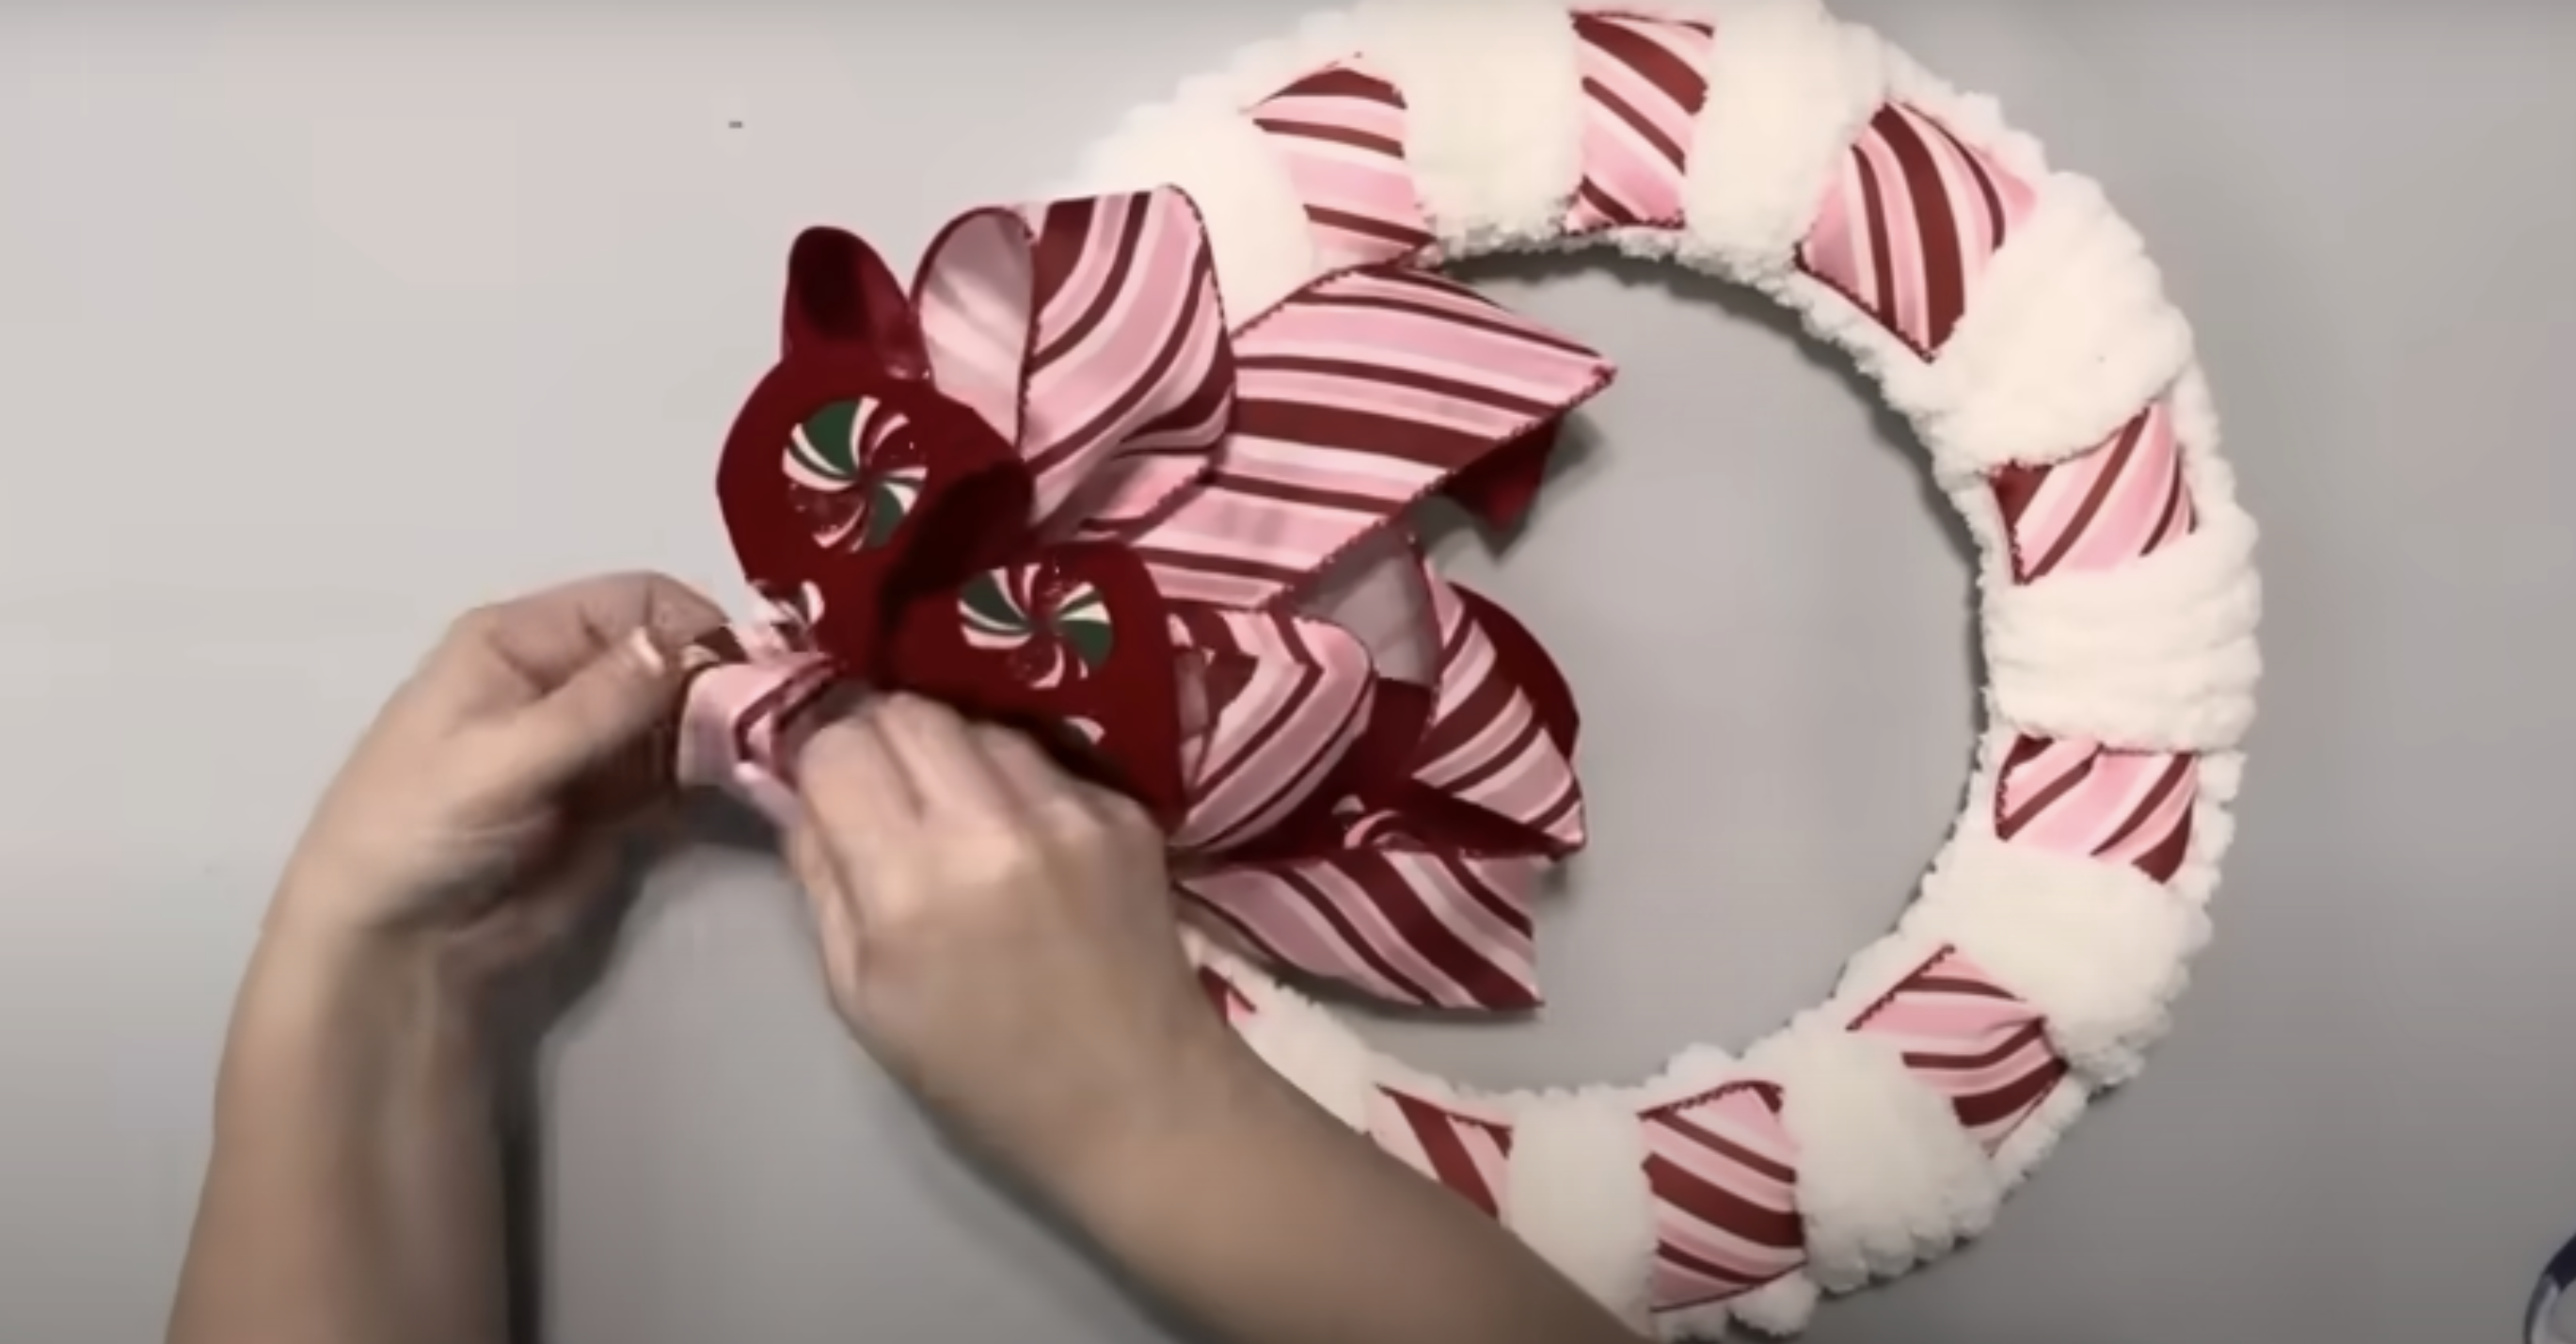
Position your completed bow where you want it on the wreath, typically over the slightly bulkier section where you finished your yarn wrapping.
Once you’re happy with the placement, push the pipe cleaner ends through the yarn to the back of the wreath.
Twist the pipe cleaner ends together at the back, securing the bow firmly to the wreath. Trim any excess pipe cleaner length.
Return to the front of the wreath and fluff the bow loops again, arranging them to your liking. Trim the ribbon tails at angles for a polished look.
For a Detailed Tutorial on How to Make Chunky Yarn Wreaths, Check out the Video Below:
Some Amazing Customisation Ideas for Yarn Wreaths
Here’s a list of ideas for customizing yarn wreaths. With these, you can decorate your wreaths as per the occasion and season:

- Mix Different Yarn Textures: Use chunky, fluffy, or even metallic yarns to add depth and interest to your wreath.
- Add Seasonal Decorations: Attach small pumpkins, snowflakes, flowers, or mini ornaments to match the season or holiday.
- Incorporate Faux Greenery or Flowers: Add greenery or artificial blooms for a natural, fresh look that lasts all year.
- Use Color Themes: Pick color schemes that match your home decor or special occasions, like pastels for spring or reds and golds for winter.
- Personalize with Letters or Name Tags: Add wooden letters, monograms, or name tags to make your wreath truly personal.
- Add Ribbons and Bows: Tie colorful ribbons or make a large bow to give your wreath a charming finish.
- Use Beads or Buttons for Extra Detail: Sew or glue on beads, buttons, or small charms to create a playful, detailed design.
- Create Layered Effects: Wrap multiple yarn colors together or add fabric layers for a fuller, more dynamic look.
Tips for Safe and Beautiful Yarn Wreath Crafting
Here are some additional tips listed below that you can refer to for extra support and better crafting:
- Work with hot glue in small amounts to avoid burns; chunky yarn can still allow heat to transfer through.
- If your yarn is particularly thick, you may need to adjust the number of wraps to cover your frame fully.
- For extra fullness, gently pull the yarn loops outward after completing your wreath.
- Store your wreath flat or hang it in a plastic bag to protect it from dust.
- For outdoor use, consider spraying with a fabric protector to help repel moisture.
Conclusion
Making your yarn wreath is a fun way to add a personal touch to your home. Whether you choose bold colors, soft neutrals, or playful textures, each wreath becomes a one-of-a-kind creation.
Plus, it’s a great way to relax and enjoy some creative time. Best of all, yarn wreaths can be reused and updated for every season, making them both beautiful and eco-friendly.
So gather your supplies and get started. Enjoy the process of crafting a wreath that will brighten your space and welcome guests with warmth and style.
Frequently Asked Questions
How Long Does It Take to Make a Chunky Yarn Wreath?
Most crafters can complete a chunky yarn wreath in about 30 minutes, though the time may vary based on your experience and the size of the wreath.
How Do I Attach the Yarn to the Wreath Form?
You can start by tying the yarn to the form or using a small amount of hot glue to secure it. Then, wrap the yarn around the form, adding glue periodically if needed.
Can I Make This Wreath in Different Colors?
Yes, you can use any color of chunky yarn to match your decor or the season. White is popular for a winter look, but any color works.


